

Scanning documents on iPhone has become convenient and easy for many people. Whether you’re a student, a business professional, or just need to keep a digital copy of an important document, the built-in Notes app, and third-party scanning apps make scanning and saving your documents easy. With the built-in Notes app, you can quickly and easily scan documents on the go. In contrast, third-party apps offer more advanced features, such as automatic edge detection, image enhancement, and the ability to export scans to various file formats.
In this article, I will guide you through scanning documents on an iPhone, including using the built-in Notes app, a third-party scanning app, scanning multiple pages, and exporting and sharing scans.
How to scan documents on iPhone using the built-in Notes app
The Notes app on your iPhone has a built-in document scanning feature that allows you to quickly and easily scan documents. This feature is available on iPhone models running iOS 11 or later. You can also find this feature on newer iPads.
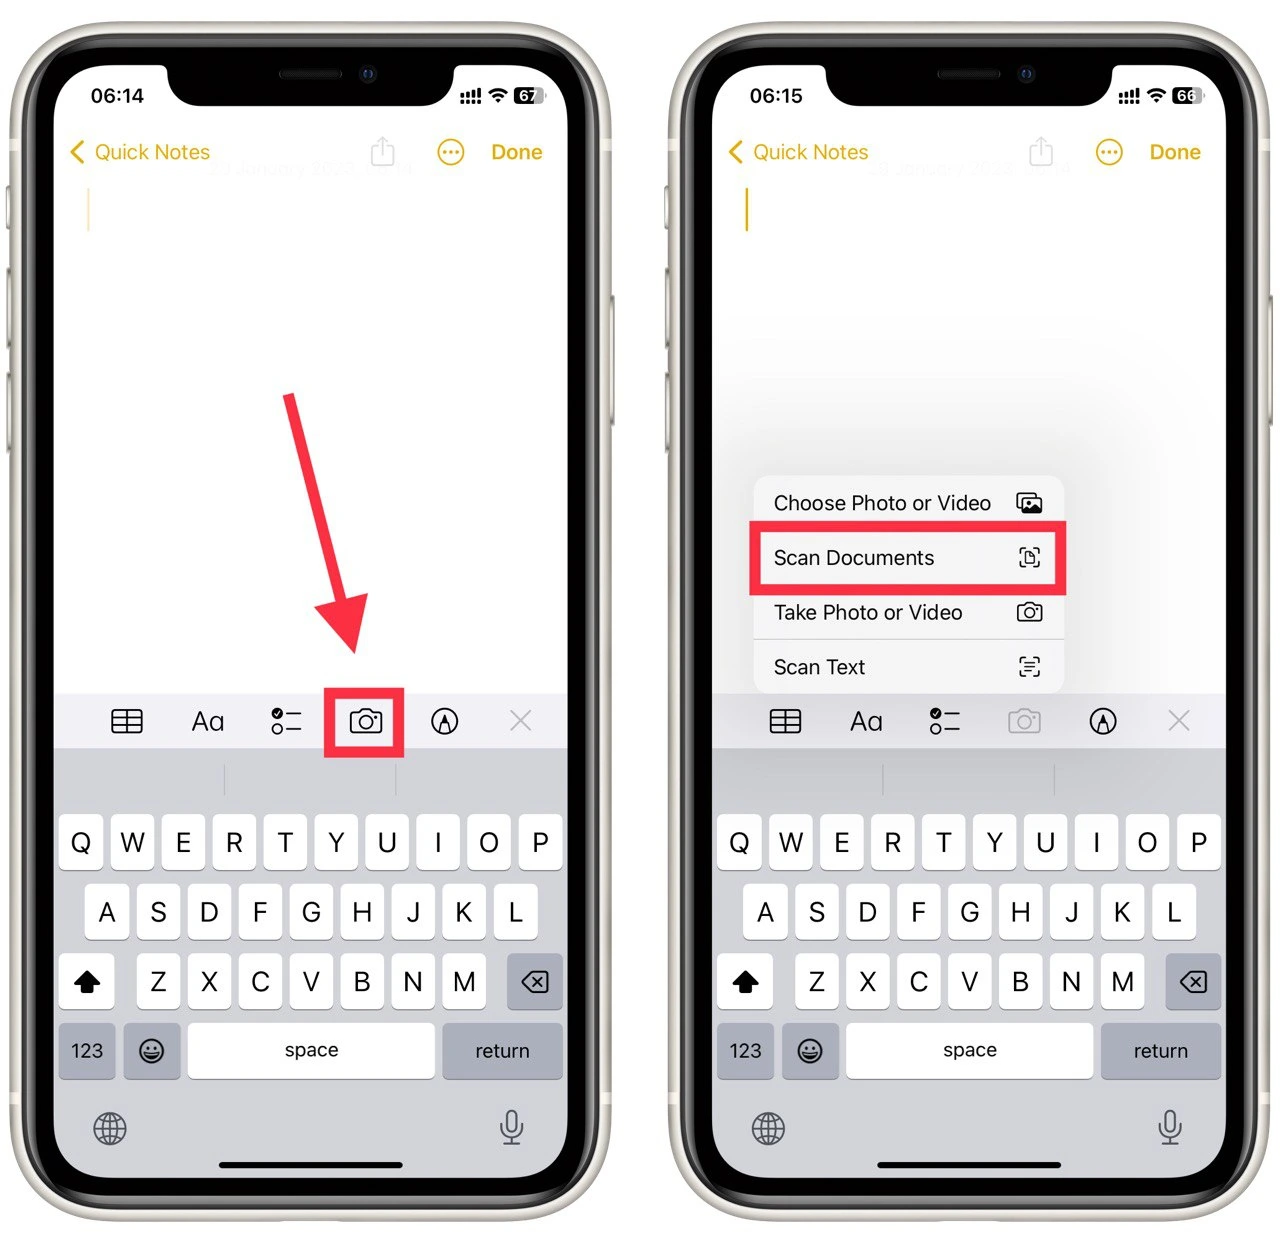
To use this feature, open the Notes app, create a new Note, and tap on the camera icon in the toolbar. In the pop-out list, you need to select Scan Documents. When you point your camera on the document app will automatically detect the edges of the document and take a photo. The app will then process the image and create a scanned document with sharp edges and a transparent background.
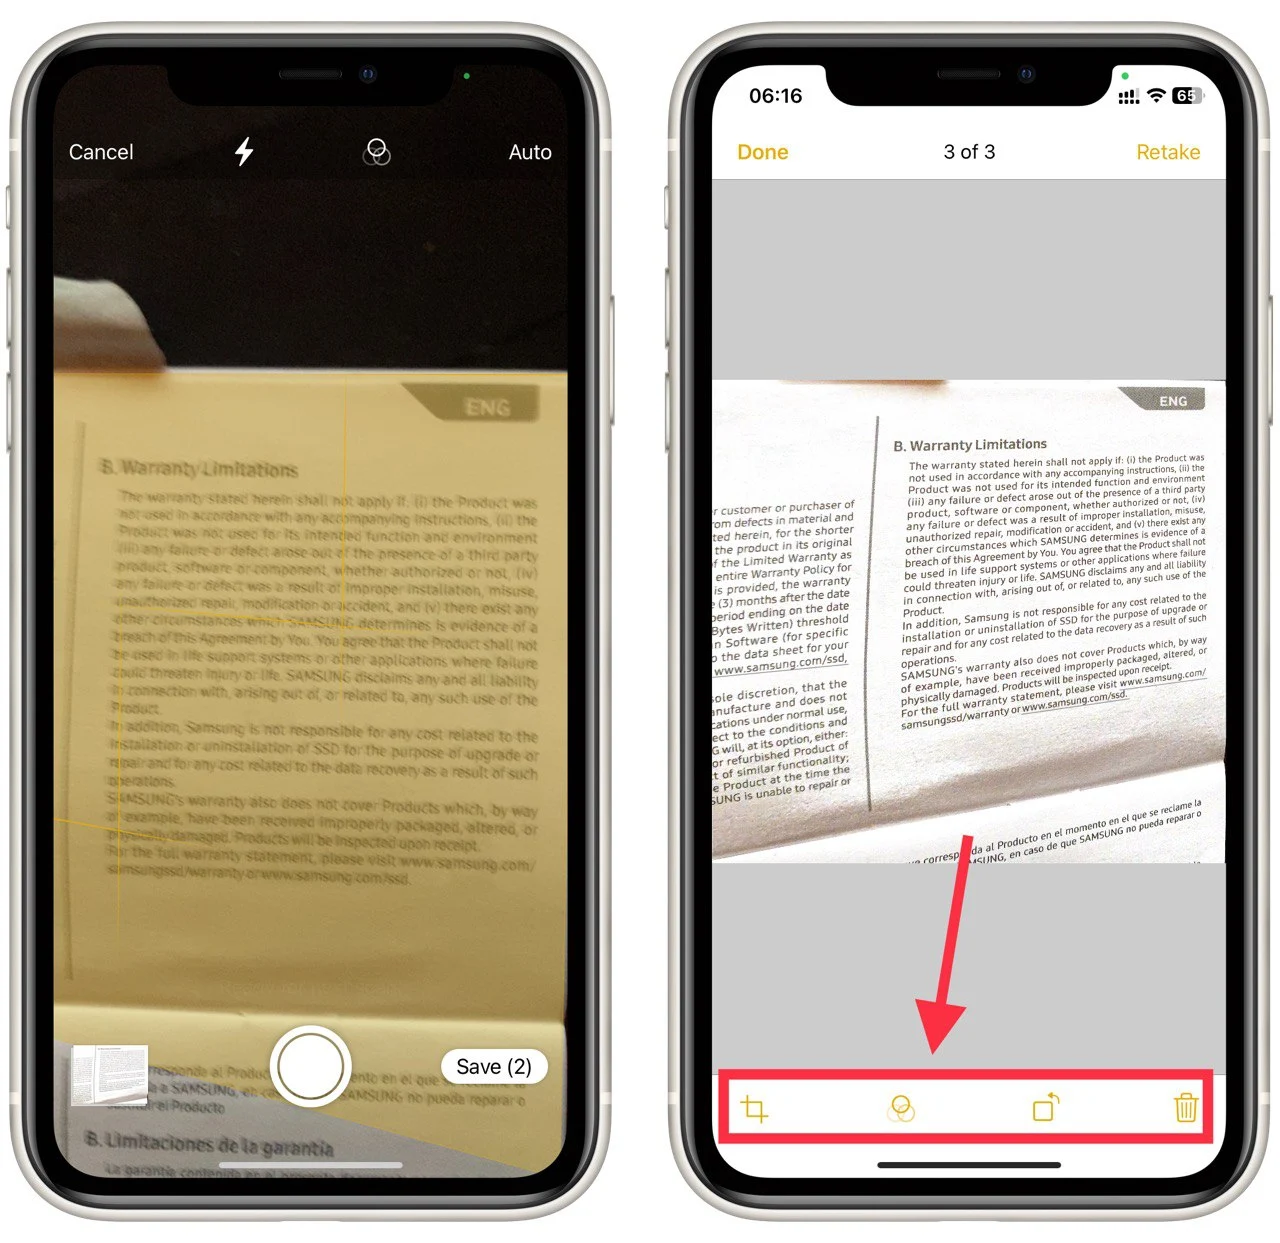
You can adjust the crop as needed by using a cut tool on document previews. Once satisfied with the scan, tap the “Save” button in the right corner. The scanned document will be saved in your new note, where you can view, edit, or share it.
How to scan documents on iPhone using a third-party scanning app
Many third-party scanning apps are available for iPhones, such as Adobe Scan, Scanbot, and Genius Scan. These apps offer more advanced features, such as automatic edge detection, image enhancement, and the ability to export scans to various file formats.
To use these apps, download one from the App Store and follow the prompts to take a photo of your document. The app will then process the image and create a scanned document with sharp edges and a clear background.
You can adjust the crop as needed and use the app’s editing tools to enhance the image. Once you’re satisfied with the scan, you can export it to various file formats such as PDF, JPG, or PNG. Some apps also allow you to export scans to cloud services such as Dropbox or Google Drive or even send them via fax. A third-party scanning app gives you more control over the final scan and is a great option for those needing more advanced features.
How to scan text on photos on iPhone
Scanning text on photos on iPhone can be done using the built-in Photos app or a third-party scanning app. Both methods allow you to easily extract text from photos and save it as a text document.
Using the built-in Photos app:
- Open the Photos app on your iPhone and choose your photo.
- Take a photo of the text you want to scan or select a photo from your camera roll.
- Click and hold your touch on the desired text.
- You will see that the desired text is highlighted in blue.
- You need to extend the selection to all the text you are interested in.
- Then click Select All or Copy in the pop-up menu.
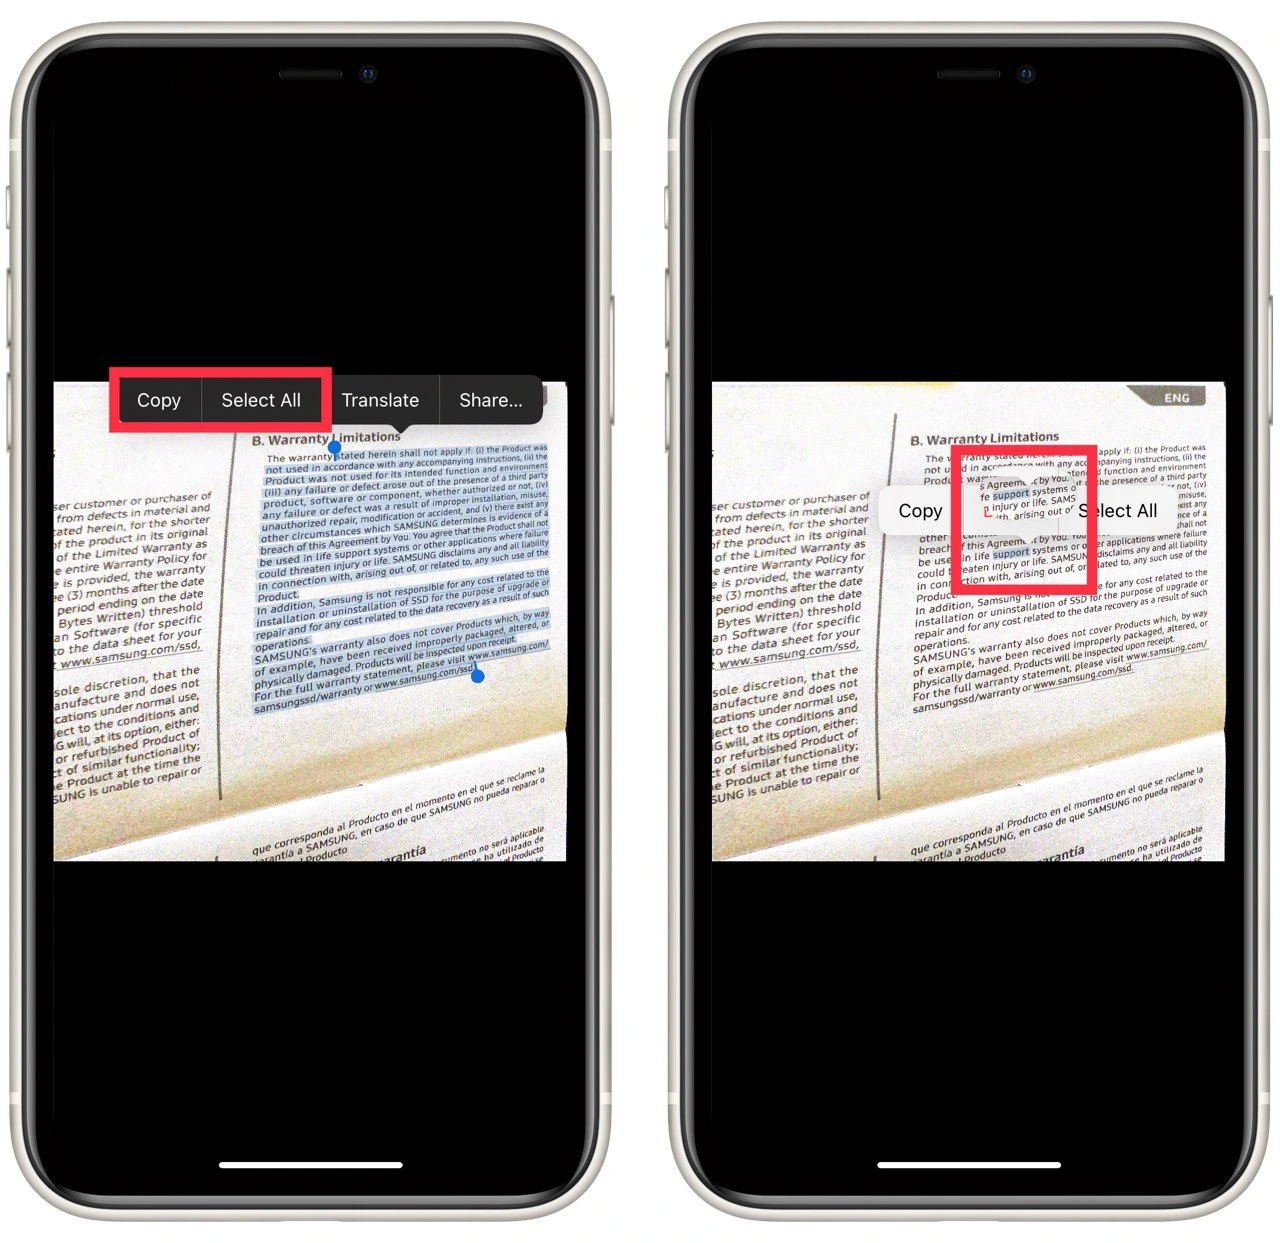
- You can add the copied text to any note, text document, or even send it directly to the desired recipient.
Using a third-party scanning app:
- Download and install a scanning app from the App Store, such as Adobe Scan or Scanbot.
- Open the app and take a photo of the text you want to scan, or select a photo from your camera roll.
- The app will automatically detect the text in the photo and allow you to select it.
- Once you’ve selected the text, the app will extract it and save it as a document.
Both methods allow you to easily extract text from photos and save it as a text document, making it easy to copy and paste the text into other apps or documents. You can also export the text document to cloud services like Dropbox or Google Drive.
How to share scanned documents on iPhone
Once you’ve scanned your document, you can export and share it in various ways. The built-in Notes app allows you to save scans to your notes and share them via email or iMessage. You can also share the scanned document with other apps like WhatsApp, Telegram, and more. You need to open this note and use the Share button at the top center of the note itself. You can also choose to send only the scan itself. To do this, click on the Share button in the preview menu.
Using a third-party scanning app gives you even more options for exporting and sharing your scans. Many apps allow you to export scans to cloud services such as Dropbox or Google Drive or even send them via fax. Some apps also have built-in OCR (Optical Character Recognition) technology which can help you to extract text from the scanned document, which you can select according to the instructions above and send directly to the desired contact or paste into the desired document.


