With Migration Assistant, you can move many apps from one Mac to another. These include built-in apps, their data, and third-party apps. To do this, your Macs must have the same version of macOS.
Migration Assistant allows you to choose three options: transfer files to Mac, Time Machine backup or startup disk or from Windows PC or to new Mac.
First, you need to open the Migration Assistant app on your Mac and enter your password. Then select one of the options and click Continue.
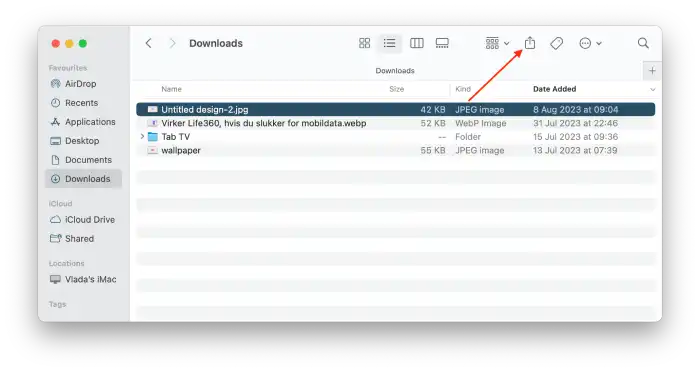
If you need to transfer some files you can use AirDrop, it is much faster than Migration Assistant. To do this, just select the files in the Finder and click Share. From the list, select AirDrop.
Things to do before you transfer files from Mac to Mac
- You can use the Migration Assistant to transfer a variety of data types and settings from one Mac to another.
- You can transfer accounts, apps, settings and preferences, network settings, files and documents, system settings, and more.
- Before you start transferring apps from one Mac to another, make sure the devices are connected to power. Your MacBook must be plugged into a power source even if it’s fully charged.
- Connect the Macs to Wi-Fi.
- Make sure you have the same version of macOS installed on both Macs.
How to transfer files from the old Mac to the new Mac with Migration Assistant?
Migration Assistant is a built-in app designed to ease the process of transferring data from one Mac to another. This tool allows users to transfer files, apps, settings, and other data from one computer to another.
To transfer files from the old Mac to the new Mac with Migration Assistant, you need to follow these steps:
- First, on the new Mac, you need to open the Migration Assistant app.
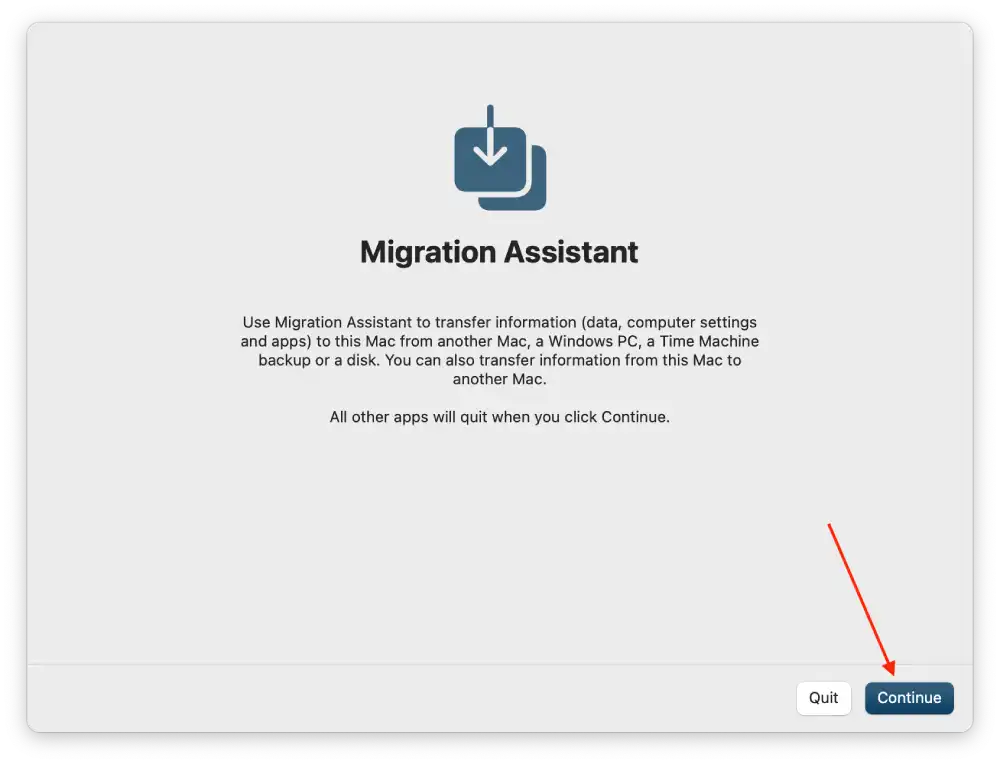
- When the app launches, click Continue.
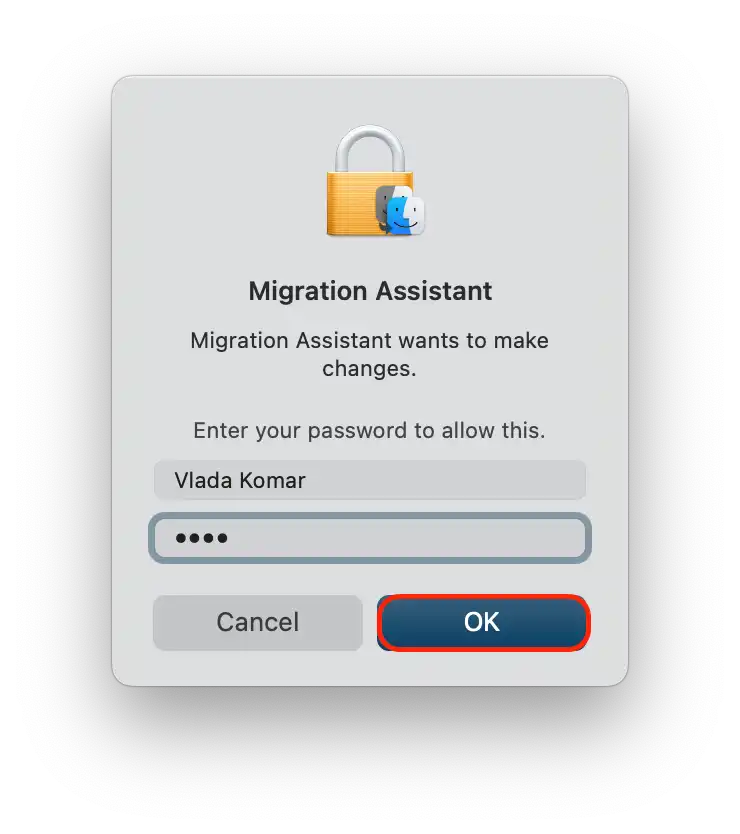
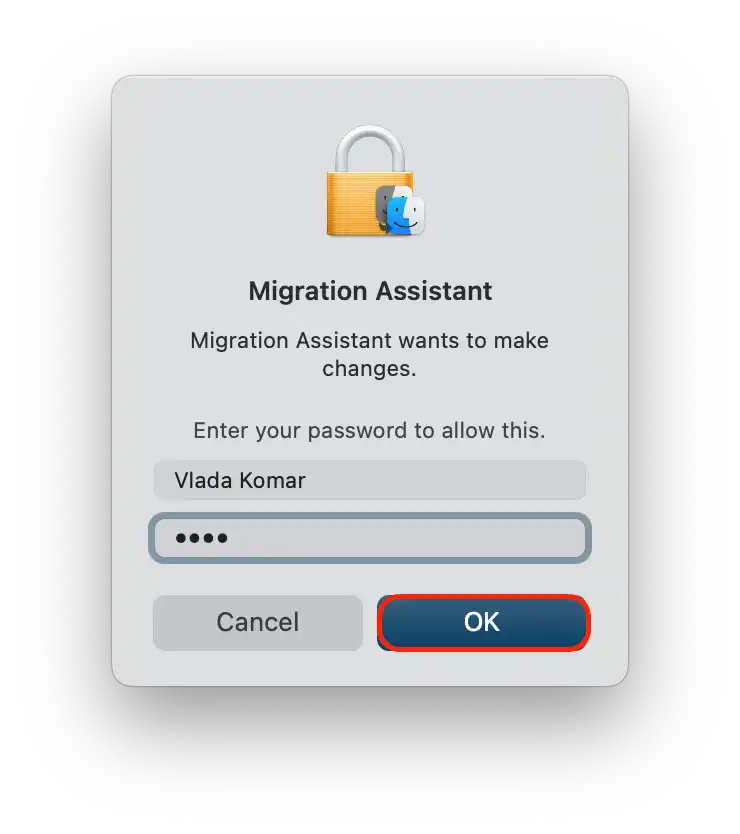
- Then enter your password and click OK.
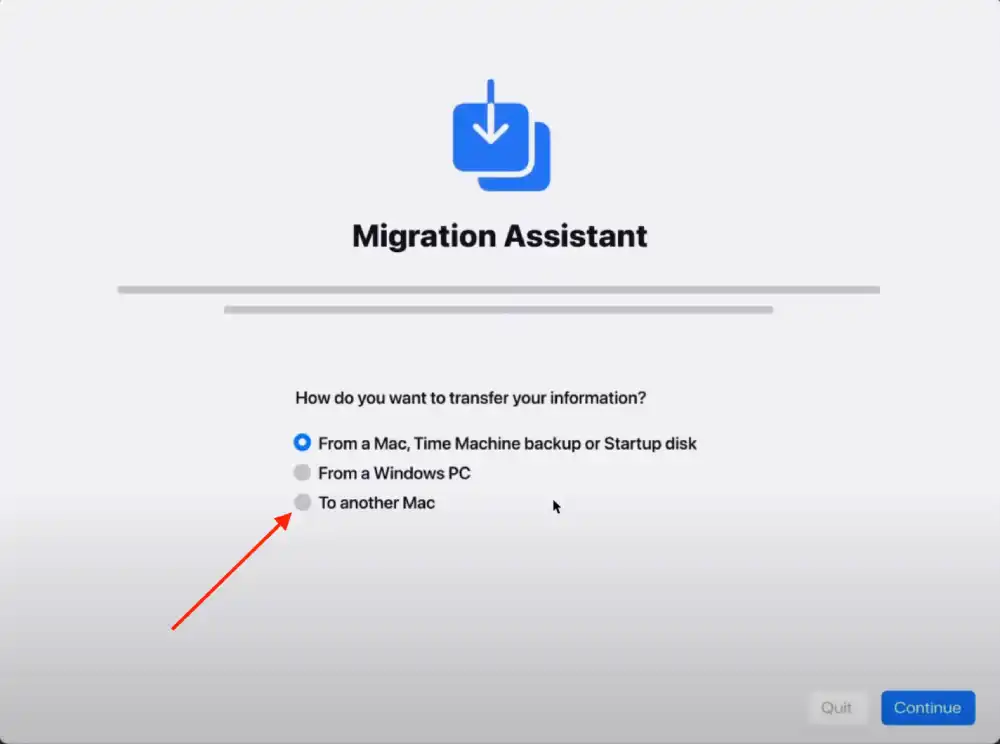
- You will see a new window where you need to select the option to transfer From a Mac and click Continue.
- Then on your old Mac, open Migration Assistant.
- Click Continue.
- Select the option to Transfer to another Mac, then click Continue.
- Enter the security code. The code will appear on one of your Macs.
- On your new Mac, select the information you want to transfer from your old Mac.
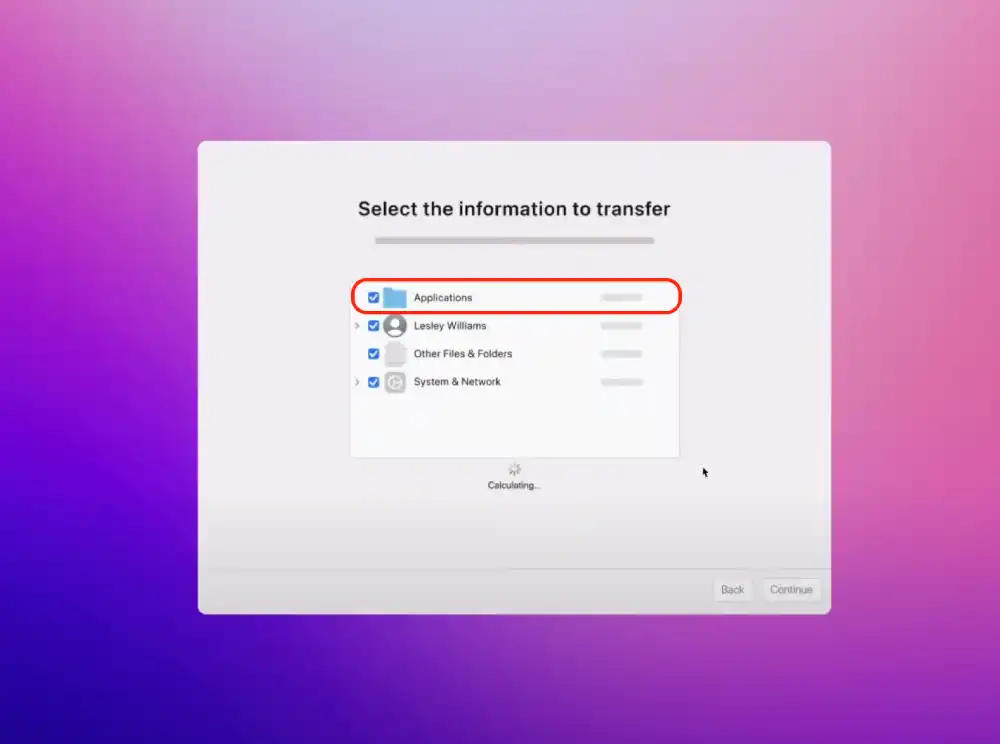
- Click Continue.
After these steps, you will need to wait a little while for the data transfer process to complete.
How to transfer files to a new Mac using a backup with Migration Assistant?
Transferring files to a new Mac using a Time Machine backup with Migration Assistant is a convenient method. But this only works if you on your old Mac you regularly backed up your data using Time Machine. This might have been on an external hard disk or network storage. So to transfer files to a new Mac using a backup with Migration Assistant, you need to follow these steps:
- First, connect your Time Machine backup disk to your new Mac and turn it on.
- Then open the Migration Assistant app.
- Click Continue.

- Select the option to transfer From a Mac, Time Machine backup or startup disk, then click Continue.
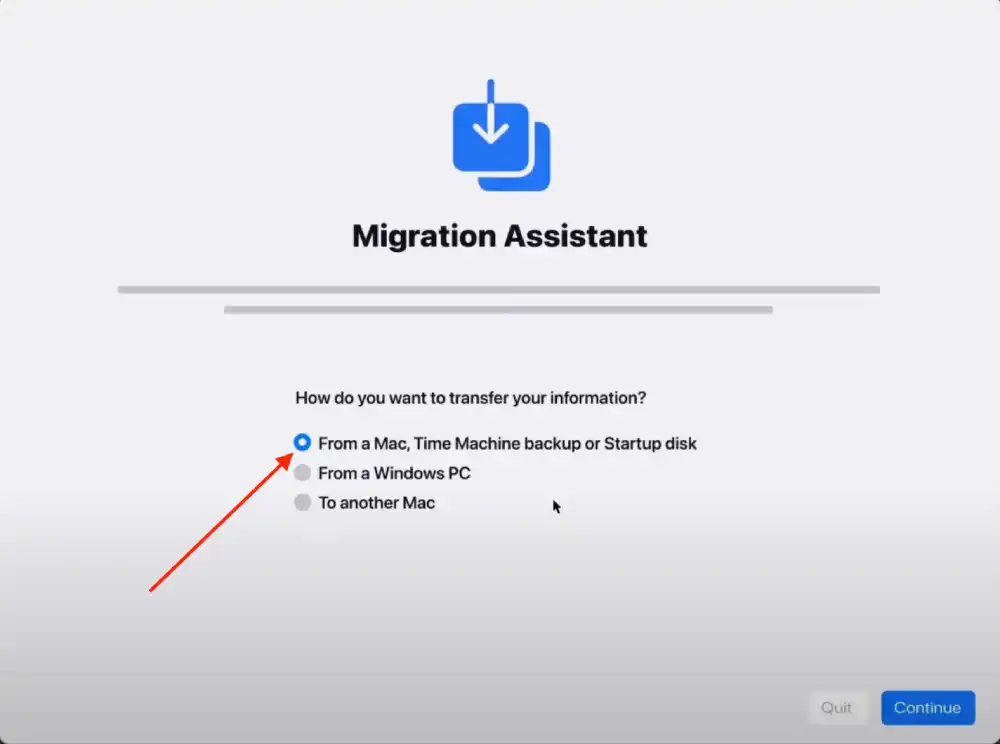
- Then you need to select a backup from the timestamped list.
- Then click Continue.
- Next, you will be presented with a window where you can choose what type of data to transfer. Check the boxes next to what you want on the new Mac.
- Click Continue.
After these steps, you will see the data transfer process on the screen. Once it is complete, you can close the Migration Assistant app.
How to transfer files from Windows PC with Migration Assistant?
If you need to share some files between Windows PC and Mac, you can install Migration Assistant on your PC. When you start following the steps below, follow the link to install the app. You need to choose the right file for you to download, as it depends on the current macOS version. Therefore, follow these steps:
- First, on the new Mac, you need to open the Migration Assistant app.
- When the app launches, click Continue.

- Then enter your password and click OK.
- You will see a new window where you need to select the option to transfer from Windows PC and click Continue.
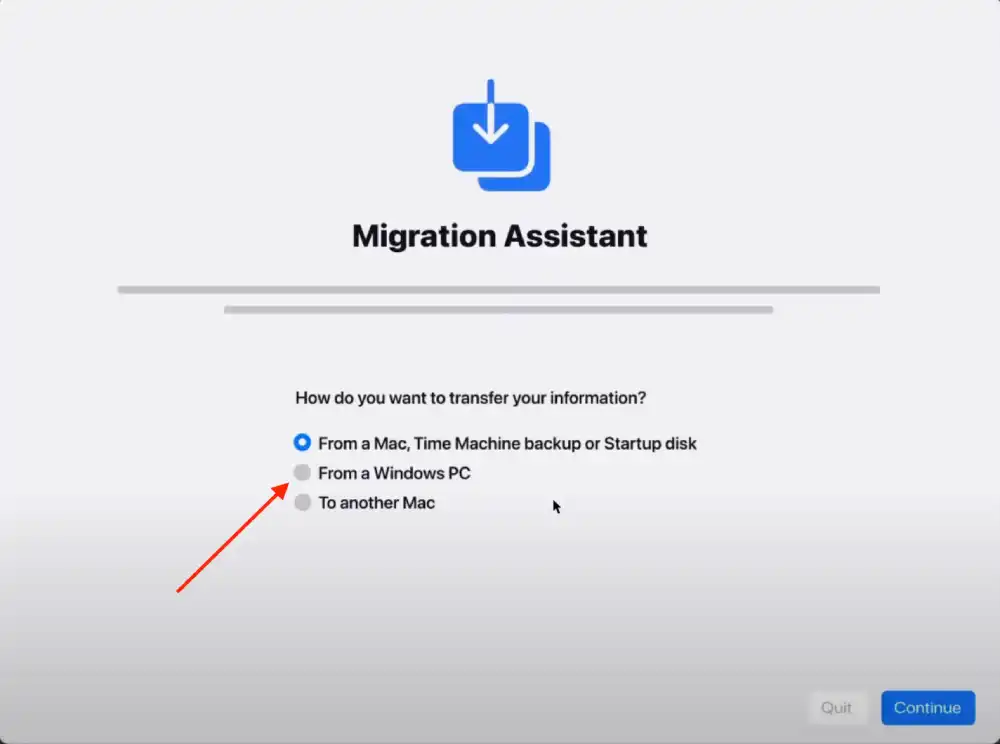
- Then you need to install Windows Migration Assistant on your Windows PC.
- Then click Continue.
- After installing the app on your PC, open it.
- On your Mac, you will see a 6-digit code that you need to enter in the app on your PC.
- On the PC, click Continue.
- Then check the boxes next to the files you want to migrate.
- Then enter the password and click Continue.
After these steps you will see a window with the data transfer process. Wait until the download is complete and follow the next steps.
How to use AirDrop to transfer files from an old Mac to a new one?
AirDrop is a convenient feature in macOS that allows you to wirelessly transfer files between Macs (or iOS devices) that are within close proximity to each other. Here’s how you can use AirDrop to transfer files from an old Mac to a new one:
- Turn on Wi-Fi and Bluetooth on both Macs.
- Open “Finder” on both Macs.

- In the Finder sidebar, select “AirDrop“.
- In the AirDrop window, set the visibility to “Everyone“.
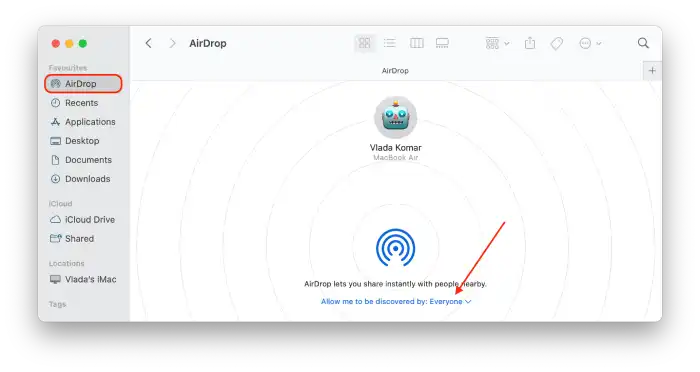
- On the old Mac, find the files and highlight them and click the Share icon.
- From the list, select AirDrop.
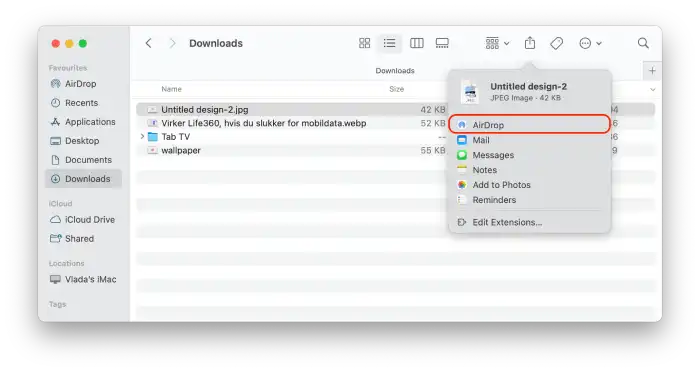
- Select the new Mac and accept the transfer.
For a successful transfer, both Macs must be in close proximity and have Wi-Fi and Bluetooth enabled.

