

Apple is constantly developing its devices, and with every new major update, the company adds fundamental features to its devices that significantly affect your user experience. The latest iPadOS 16.1 updates have brought a few of these features.
One such feature is Stage Manager, which was added in the latest update to some iPads and Macs. This feature should help turn your iPad into a multitasking device where you can quickly and conveniently work with multiple apps simultaneously.
What iPads are compatible with Stage Manager
As I described above, Stage Manager is available on Macs and some iPads. In the case of Macs, Stage Manager will be available on all devices that support the latest macOS 13 Ventura update, regardless of their hardware.
However, in the case of iPads, this is a little different. Stage Manager is only available on iPads with M1 or M2 processors and some iPads Pro. This is because to implement such multitasking on iPads, the mobile processor from iPhones was not enough.
Thus the list of supported iPads looks like this: 5th-generation iPad Air, any generation 11-inch iPad Pro, or 3rd-generation 12.9-inch iPad Pro and higher. If your device is not on this list and supports iPadOS 16.1, you will get all the other features except Stage Manager. In the future, Apple will optimize this feature. Other devices, such as the 4th generation iPad Air or the latest iPad mini, will get it, but no such information is available yet.
How to activate Stage Manager via settings on iPad
Before you start using the Stage Manager on your iPad, you must activate it in the settings, as it will be disabled by default. You can do this right in Settings with a couple of taps:
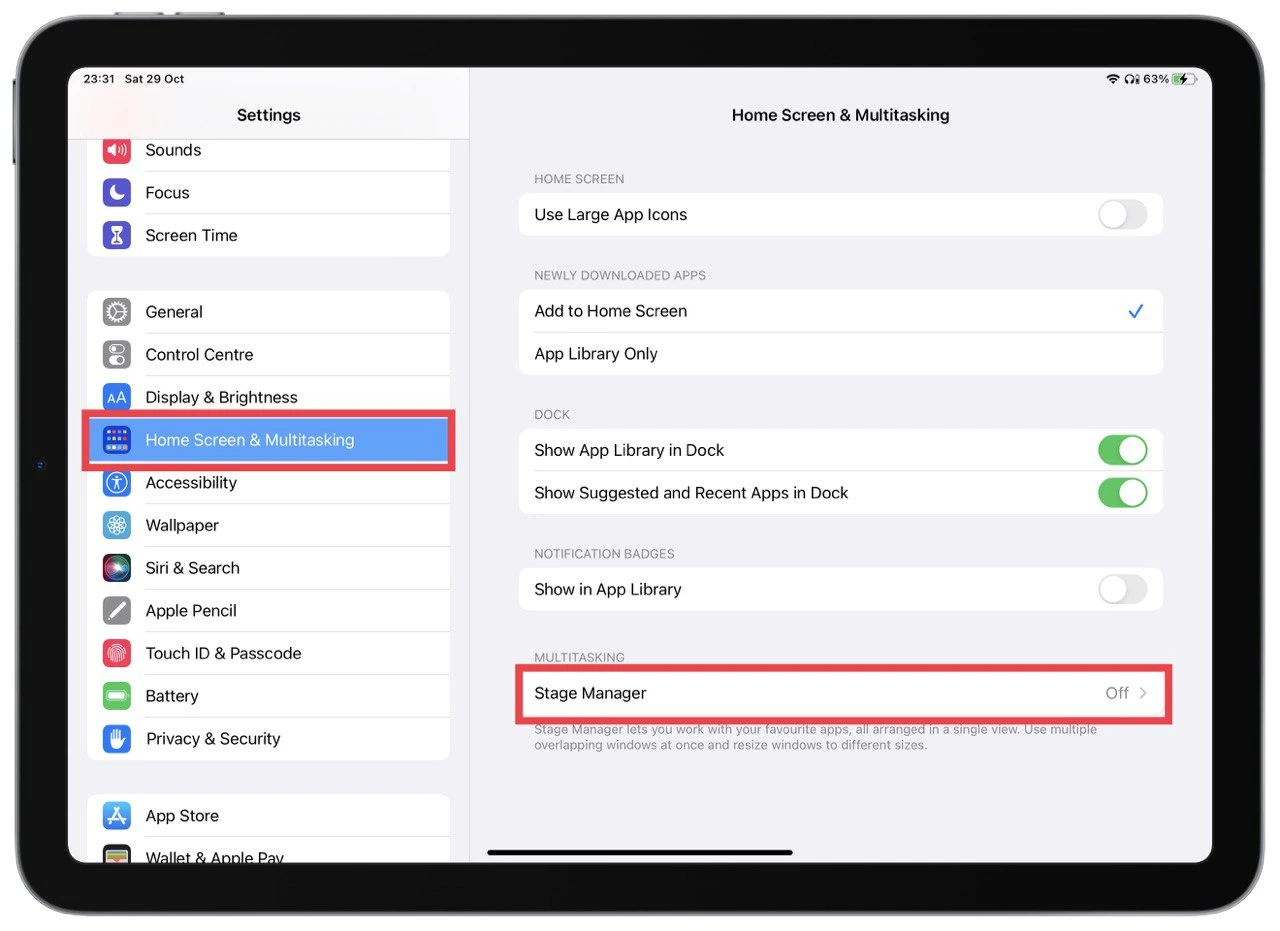
- In Settings, go to the Home Screen & Multitasking tab.
- At the very bottom of the list, select Stage Manager.
- Now turn on the switch at the very top of the screen.
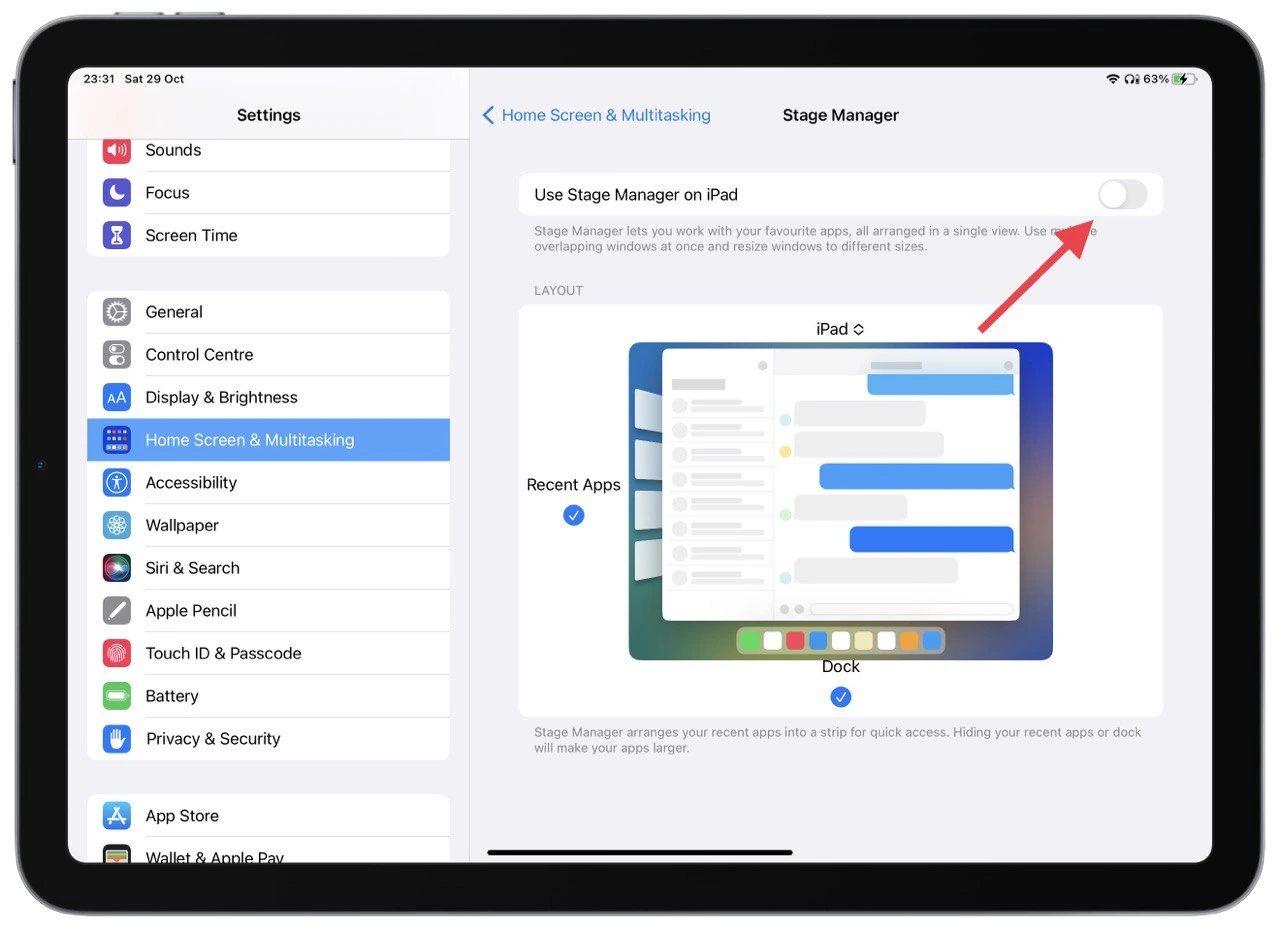
This is also where you can configure the Stage Manager. You can hide the Dock or remove the Recent Apps menu on the left side of the desktop. In my experience, I can tell you that they are somewhat helpful, so I wouldn’t advise you to turn them off straight away, especially as they don’t take up as much space as you might think.
How to add Stage Manager to control menu on iPad
In addition, an even more convenient way to activate Stage Manager is to add the appropriate button to the control menu. In this case, you can start the Stage Manager with a simple tap. To do this:
- In Settings, go to the Control Centre tab.
- In the list below, find the Stage Manager and click on the green plus sign.

- Then swipe from the top right corner to open the control menu, and you will see the Stage Manager button. It appears as a multi-application screen on the left side.
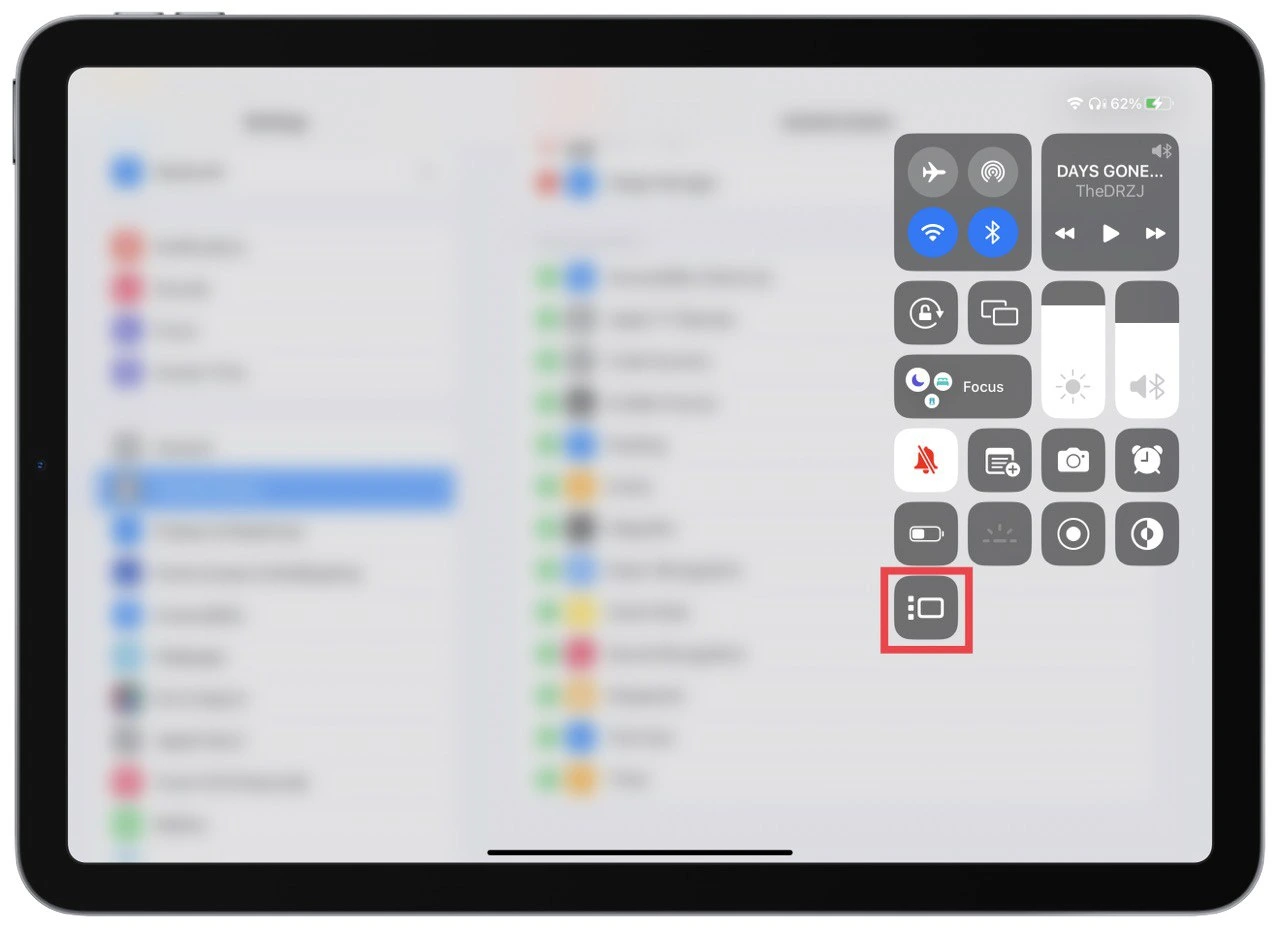
Note that an additional function setting will open if you tap and hold on to the Stage Manager in the control menu. Here you can hide or activate the Dock and Recent Apps.
How to use apps in Stage Manager on iPad
Stage Manager is a kind of alternative to Split View. At least, that’s how I felt about it. It allows you to run several applications at once and customize their display. It is very similar to the application windows you use on your PC. You can cascade them, adjust the window size, or simultaneously put up to 4 applications on the desktop. Let me tell you more about how to use this feature.
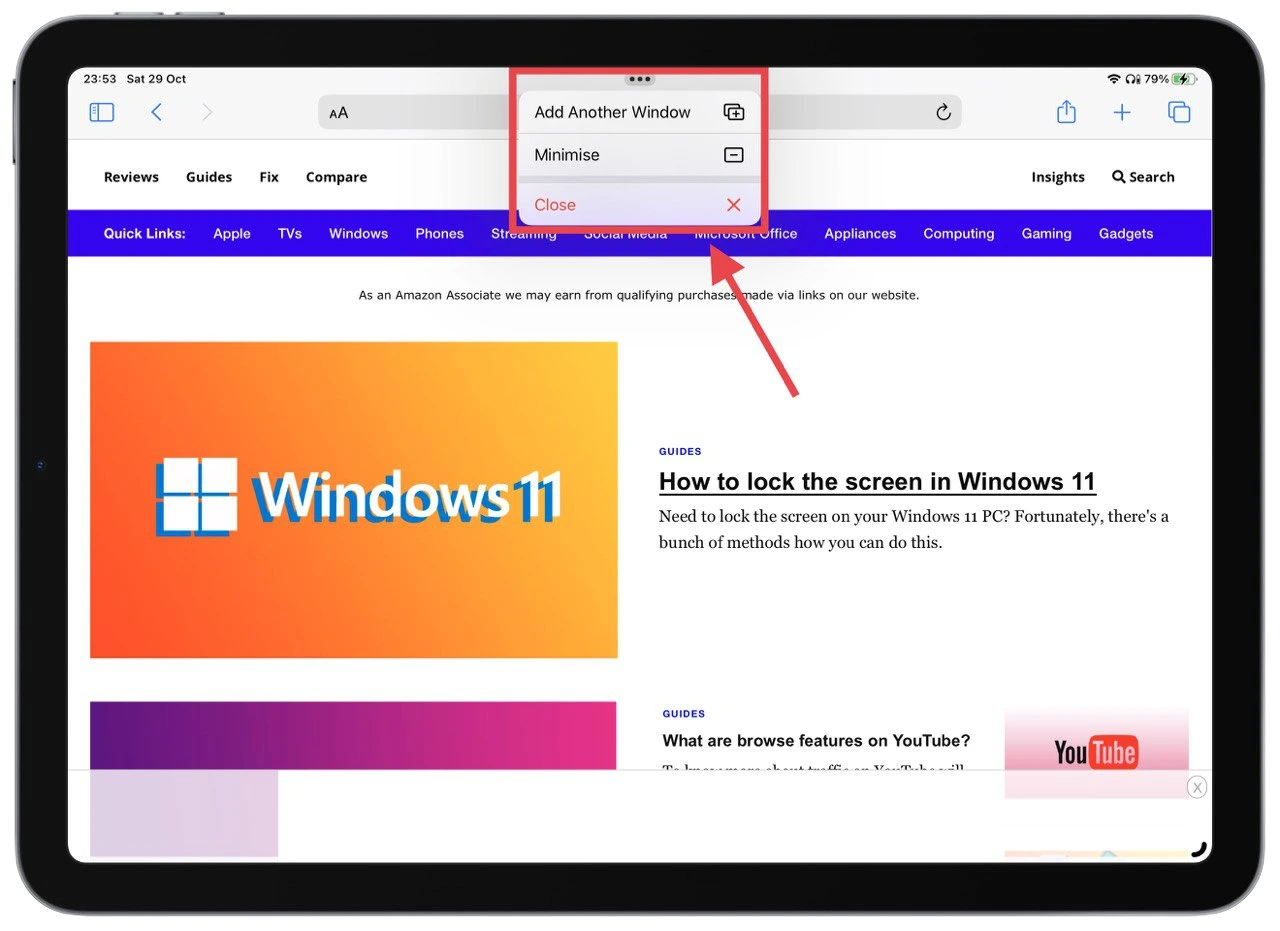
Once enabled, you can use it in much the same way as Split View. For compatible applications, you will see three dots at the top. You can hide the application or add another window by clicking on them.
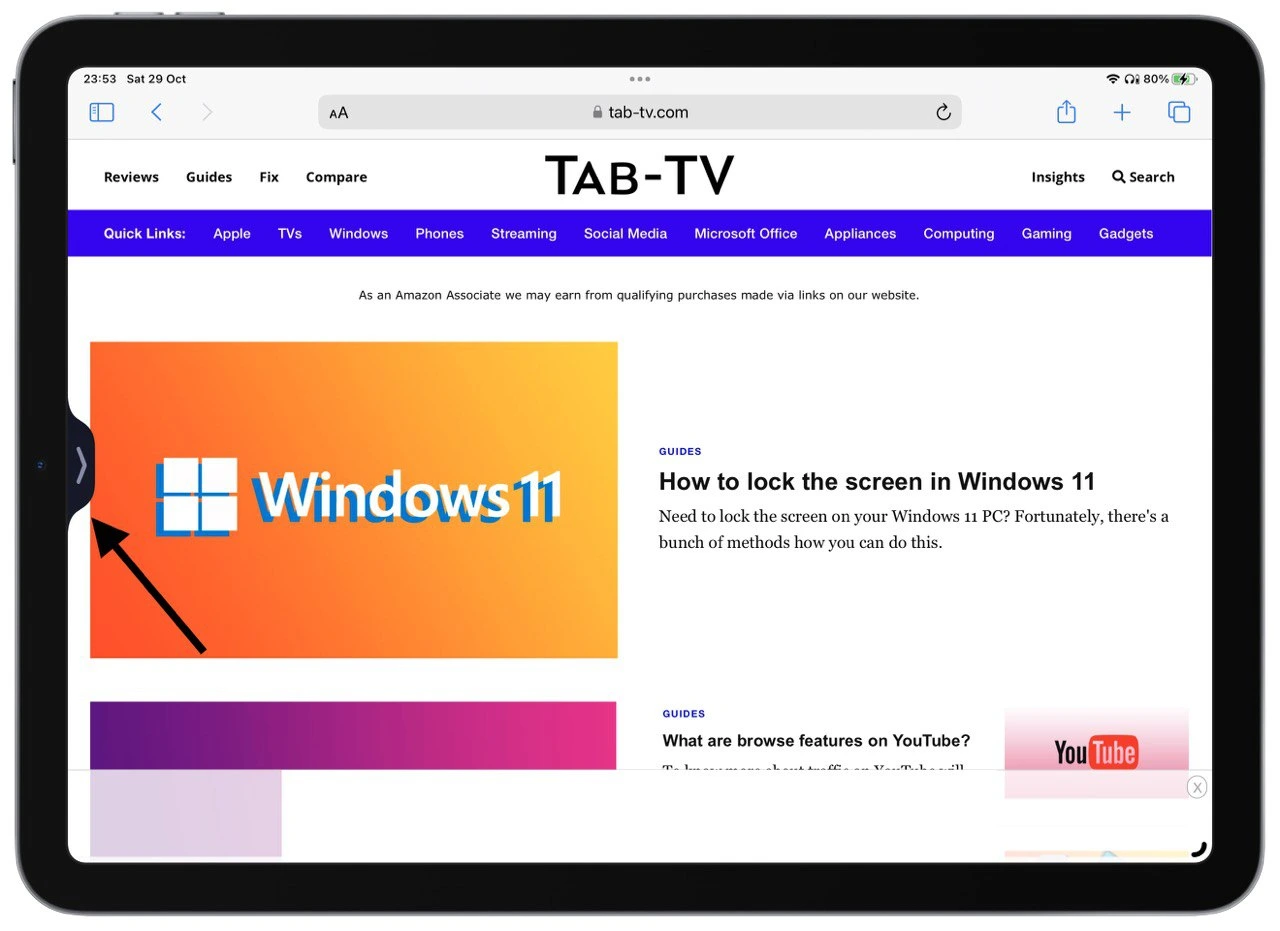
If you add a window, swipe to the left to open the “desktop,” where all the windows you have added are displayed, and you can work with them all together. You can add new applications using the Dock or the Recent Apps list on the left.
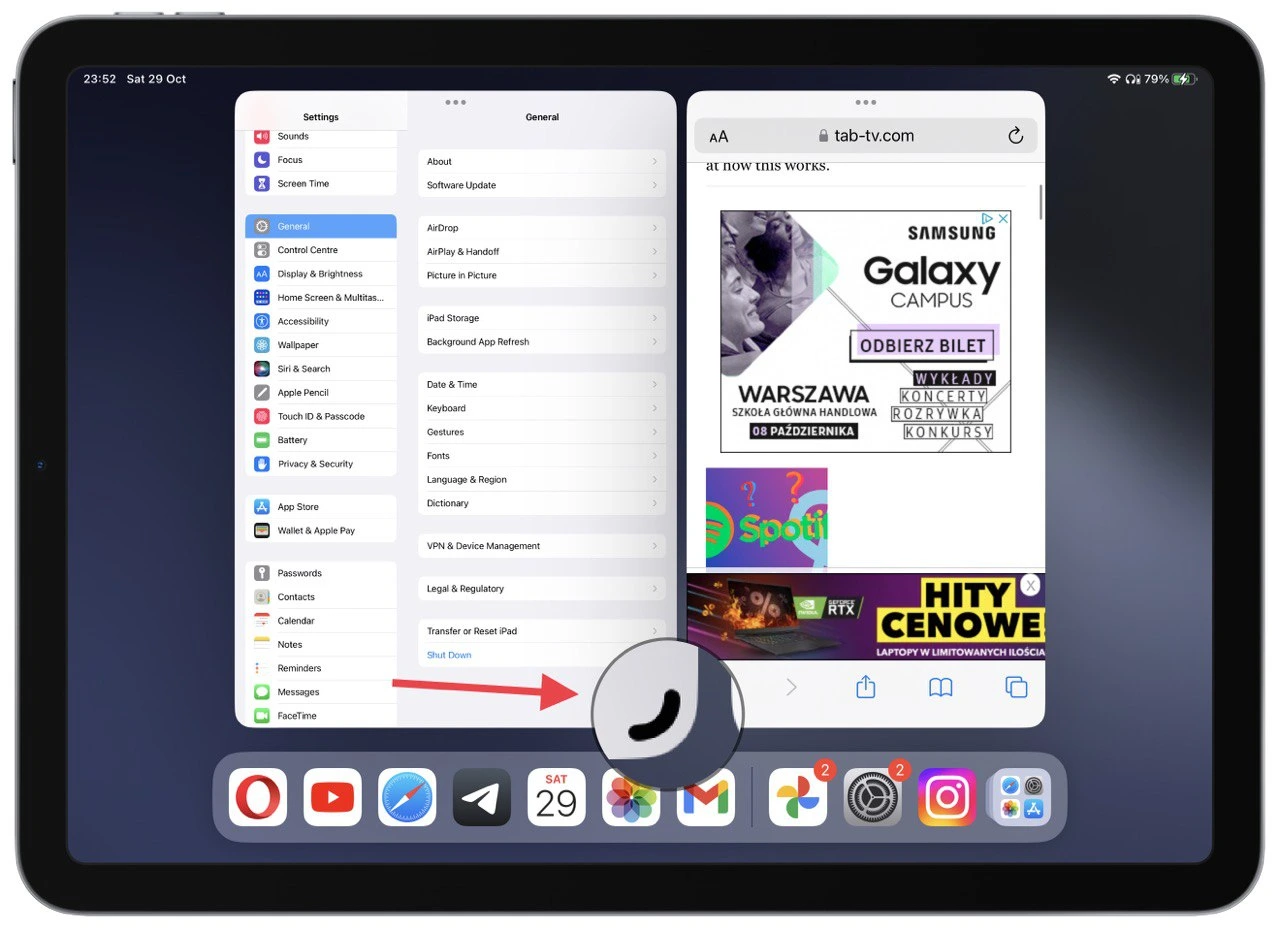
If you click on the bottom left side, you can adjust the application size on the desktop. Also, if you click on the three dots at the top of the window, you can close the application or minimize it by sending it to the Dock.
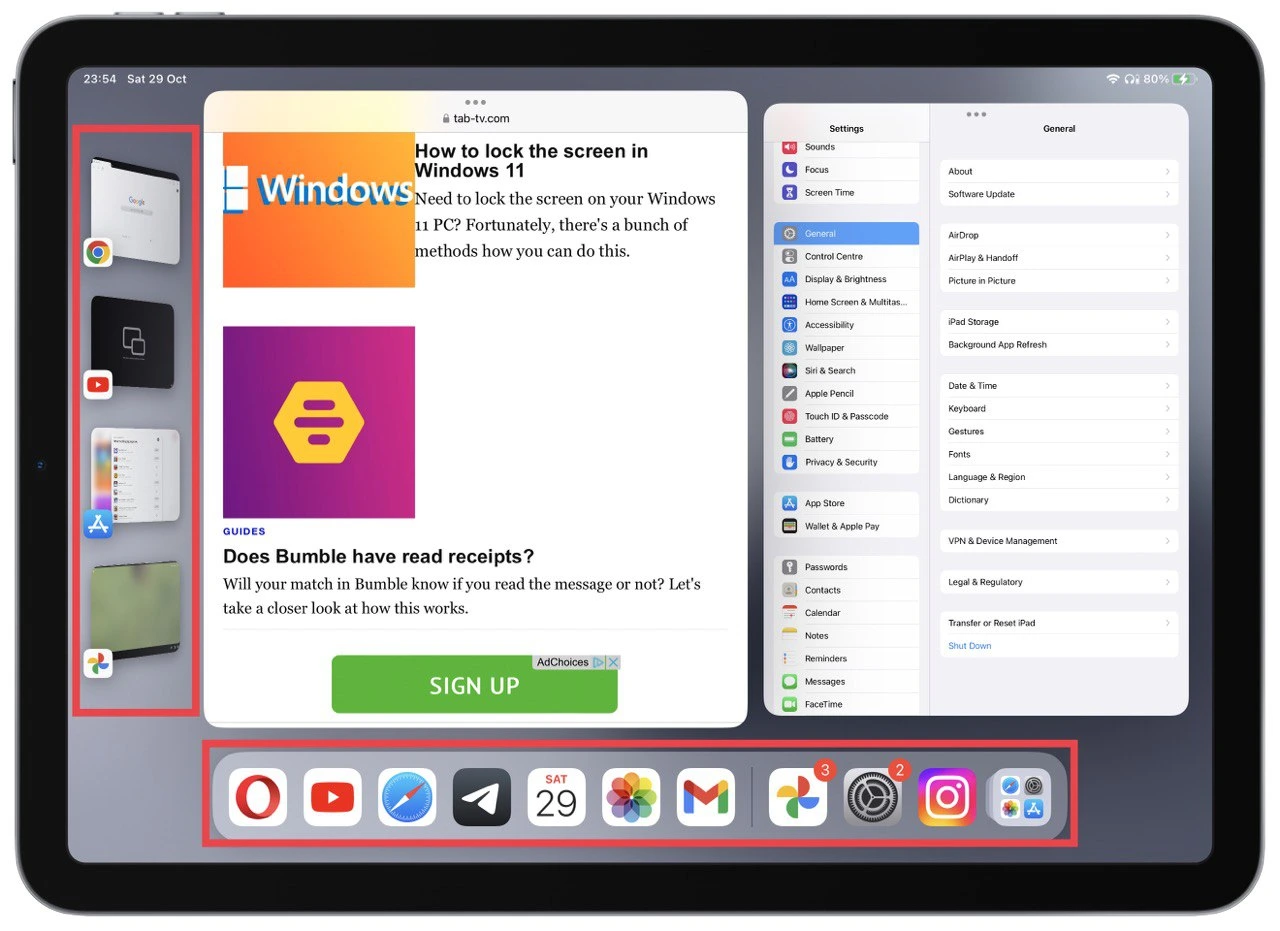
This way, you can work with up to 4 applications simultaneously, and they will perform their tasks in parallel. Not all interfaces are optimized for this at the moment. For example, in the screenshot above, you can see how strange the Settings interface is distorted in this mode.
Stage Manager vs Split View on iPad
As I described above, the first time I ran the Stage Manager, I thought, “Why should I need it when I have Split View,” The functions are very similar indeed. They give you multitasking, but the new tool is much more powerful.
First, you can work in parallel with four applications in Split View. You can only open three windows. You can also resize them anytime, drag and drop them on the screen, or add new applications in the Stage Manager.
This feature looks much more “computer-like” than tablet-like. I think it will be used together with a mouse and keyboard. This is another attempt by Apple to turn the iPad into a MacBook. I can say that it’s a successful attempt and if you figure out how and what works, it’s much more convenient and practical to use the Stage Manager than the Split View.
