

Сhanging the AirDrop name is the same as changing the device name.
Initially, your device gets the default name. For example, iPhone [Your Name], iPad [Your Name], or Mac [Your Name].
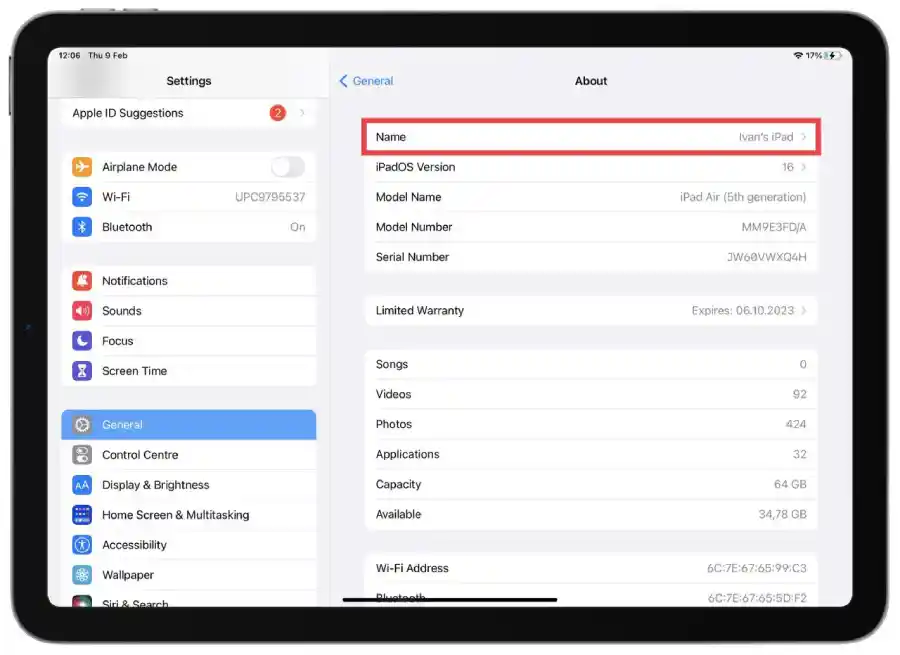
To change AirDrop’s name on iPhone and iPad, you need to open the Settings app. Then go to the General section and select the About option. Then tap on the Name section. In this window, you can change the name of your device. And then it will be displayed when you use AirDrop.
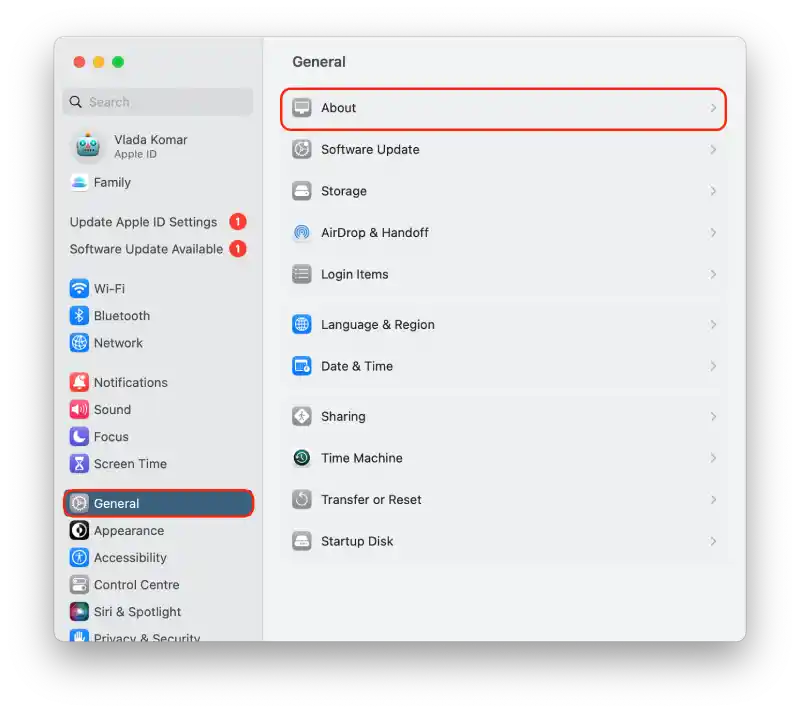
In the new macOS Ventura, the steps to customize the AirDrop name are similar to the iPhone. Using Mac, you need to open System Settings. Then on the left side of the screen, select General. Click on About and under Name, you can enter what you need.
How to change AirDrop’s name on iPhone
The AirDrop name on your iPhone corresponds to the name of your device. If you want to change the AirDrop name on your iPhone, you need to change the device’s name through settings.
Follow these steps:
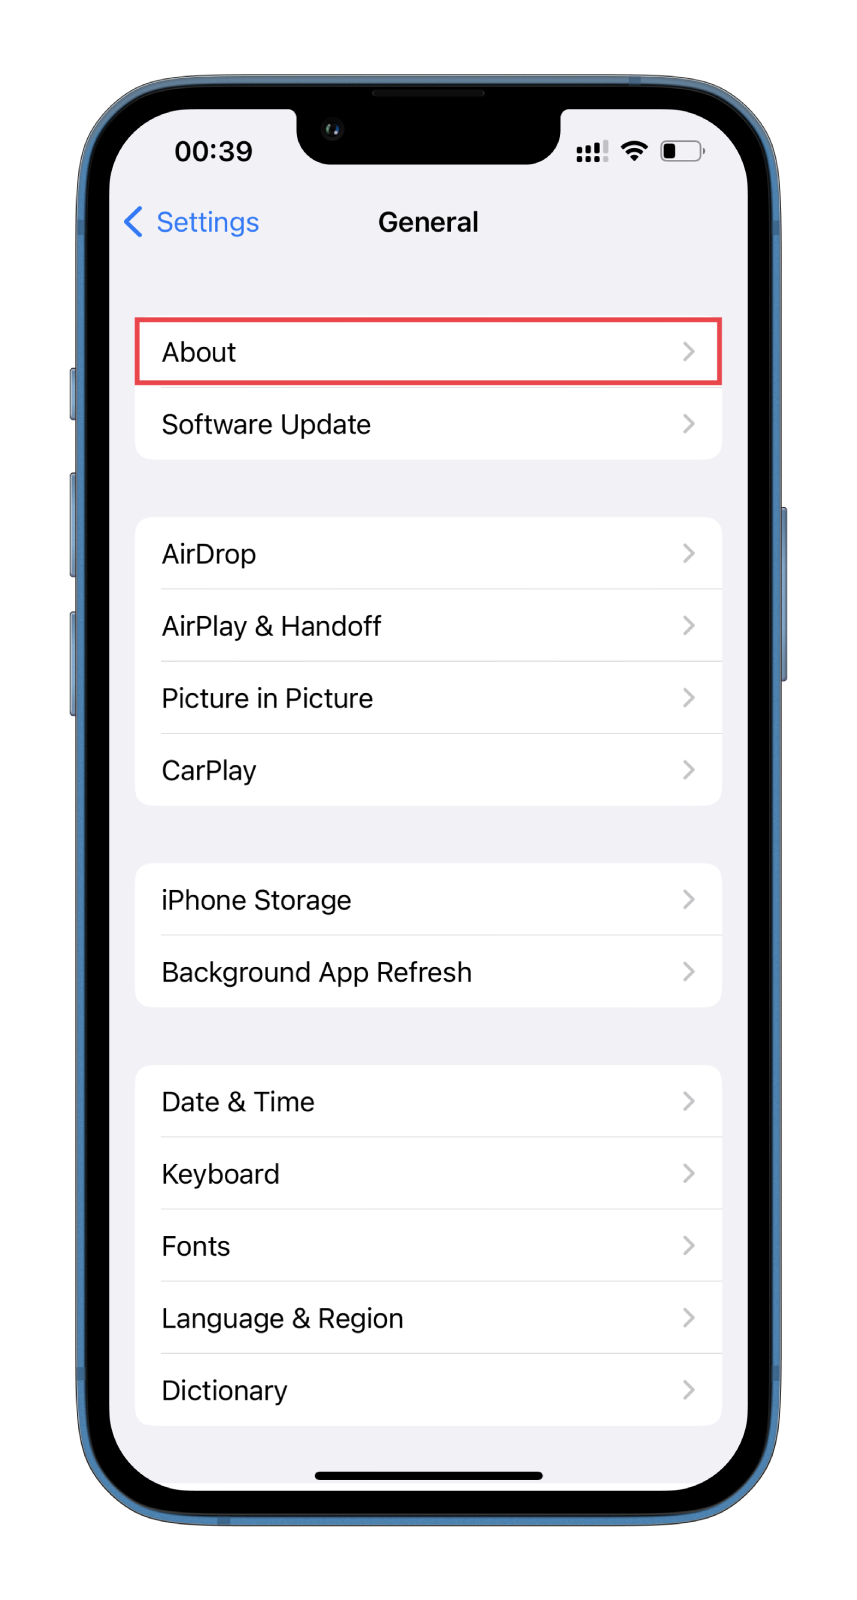
- First, open Settings and head to General.
- Select About.
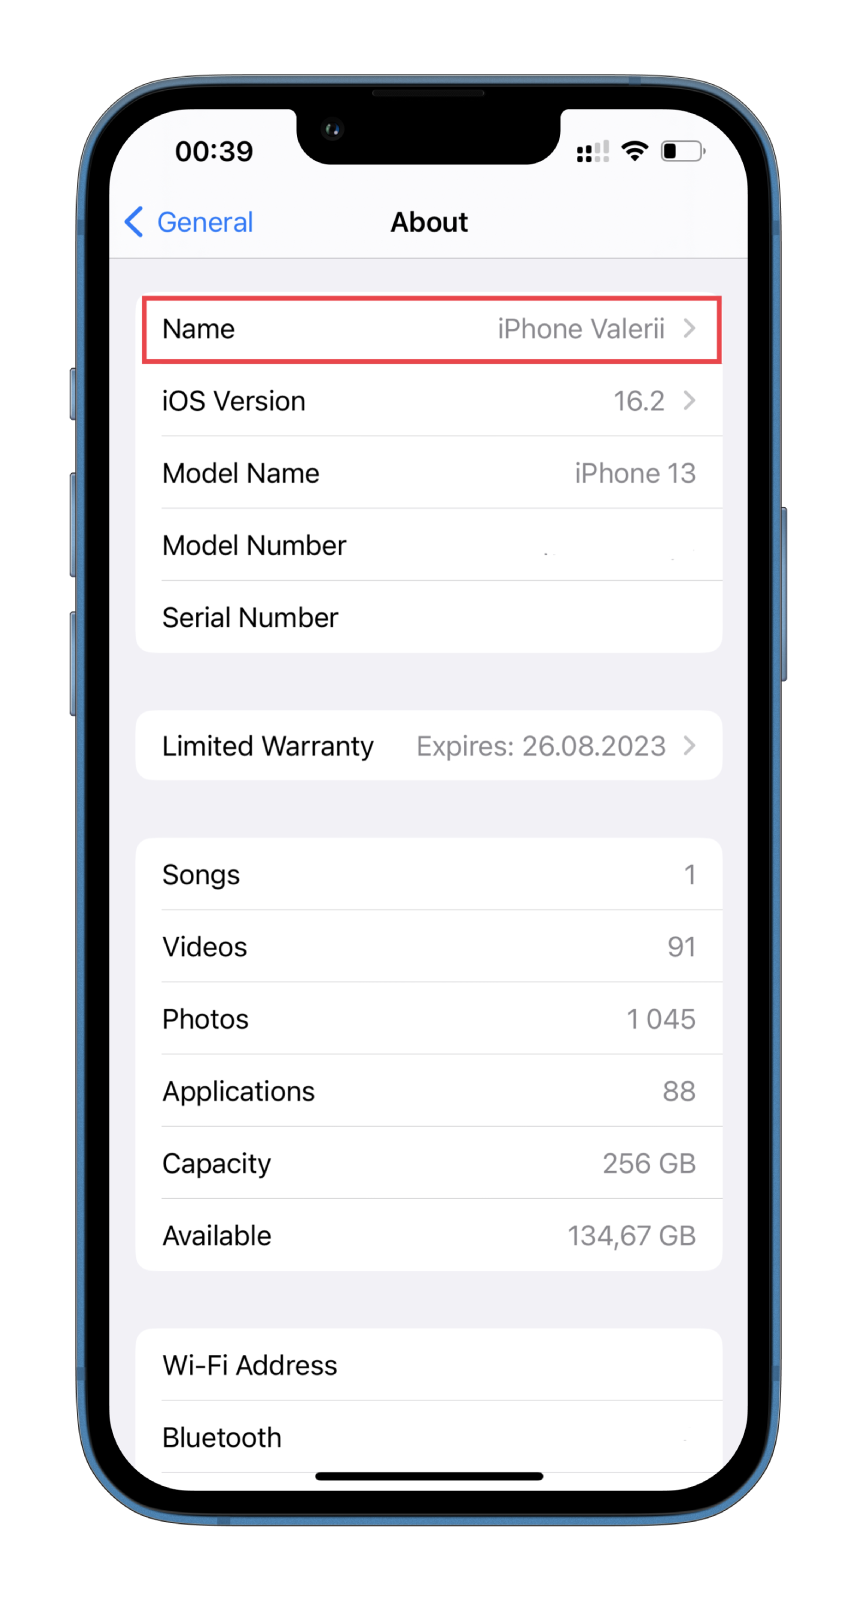
- After that, tap Name.
- Finally, enter the name and tap Done to finish the process.
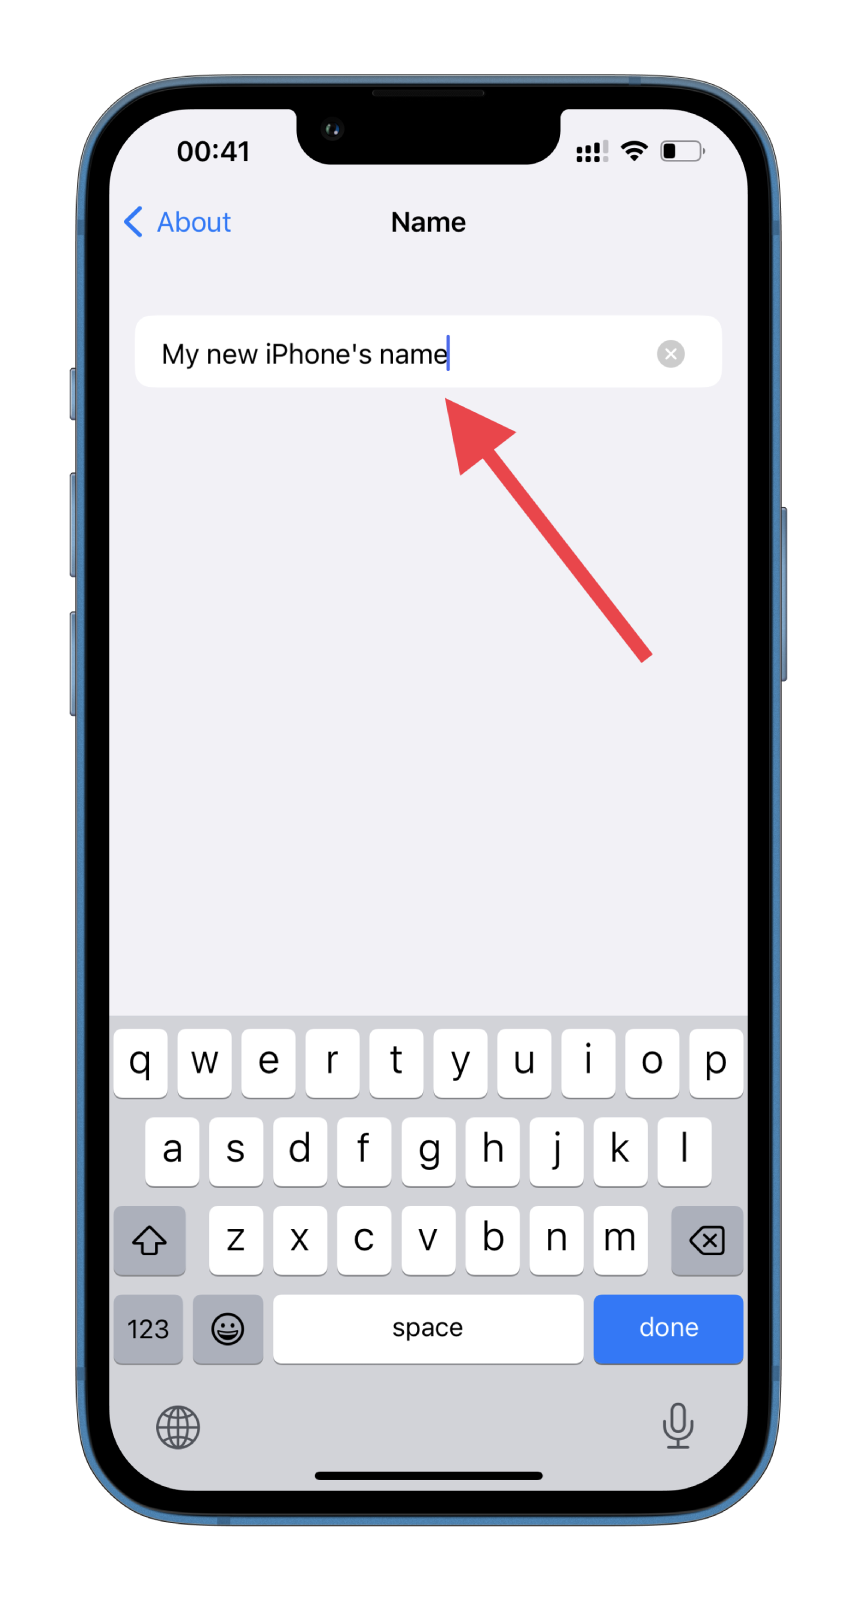
That’s it. Now your iPhone has a new name. So when you send files via AirDrop to other Apple devices, it should appear strictly as you have assigned it.
How to change AirDrop’s name on iPad
The instructions for the iPad are the same. You need to edit the iPad’s name for AirDrop’s name to change. So do the following:
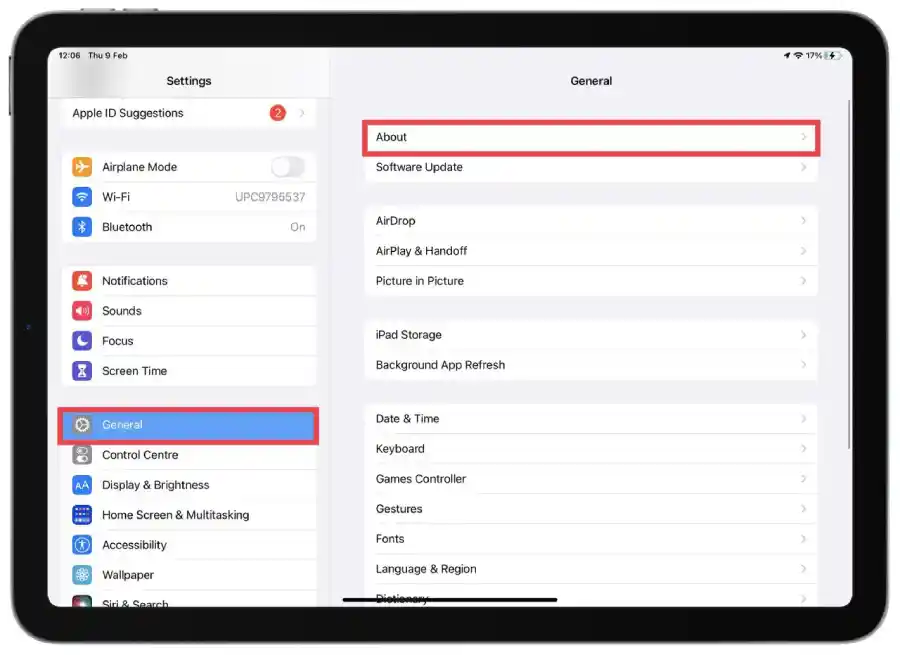
- Open Settings.
- Then go to General and select About.
- After that, tap Name.
- Enter the new name and tap Done.
You can now try sending something to another Apple device using AirDrop and see if the name is changed.
How to change AirDrop’s name on macOS Ventura
The steps to change AirDrop’s name on macOS Ventura are completely different from macOS Monterey. System Settings on macOS Ventura is more like Settings on an iPhone. Unlike macOS Monterey.
In order to change AirDrop’s name you need to change macOS Ventura’s name in the settings. To do this, follow these steps:
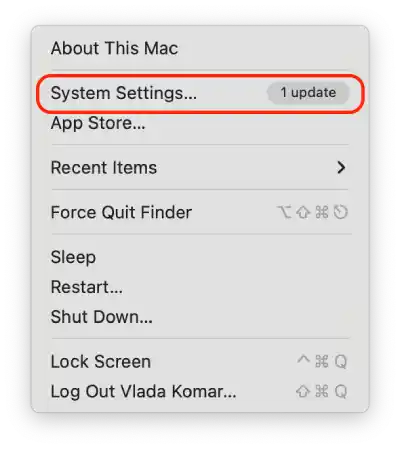
- Click on the Apple icon at the top left corner and select System Settings.
- Click on General and select About.
- Then in the new window, click on the Mac name and enter the new one right away. The changes will be automatically applied.
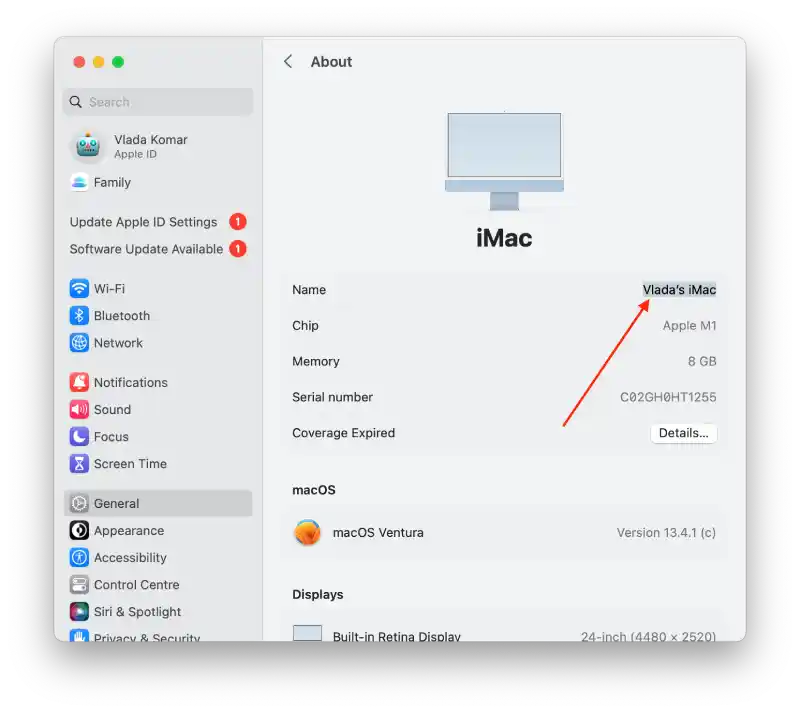
After these steps, the new Mac name will be displayed for AirDrop, Bluetooth, iCloud and also for Terminal and Command.
How to change AirDrop’s name on macOS Monterey
If you still have macOS Monterey installed on your Mac, your steps will be different. Because you need to open the Sharing section to change the Mac’s name. So the AirDrop name is the Mac name.
So to change AirDrop’s name on macOS Monterey, you need to follow these steps:
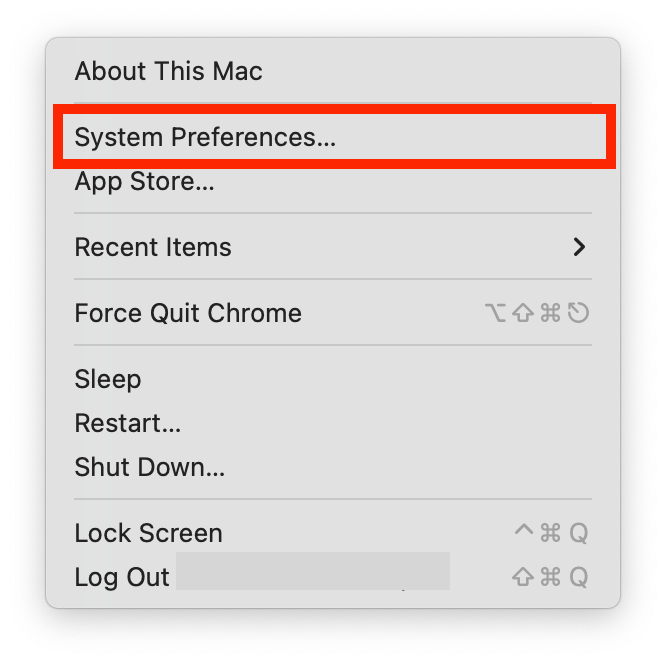
- Click on the Apple icon at the top left corner and select System Preferences.
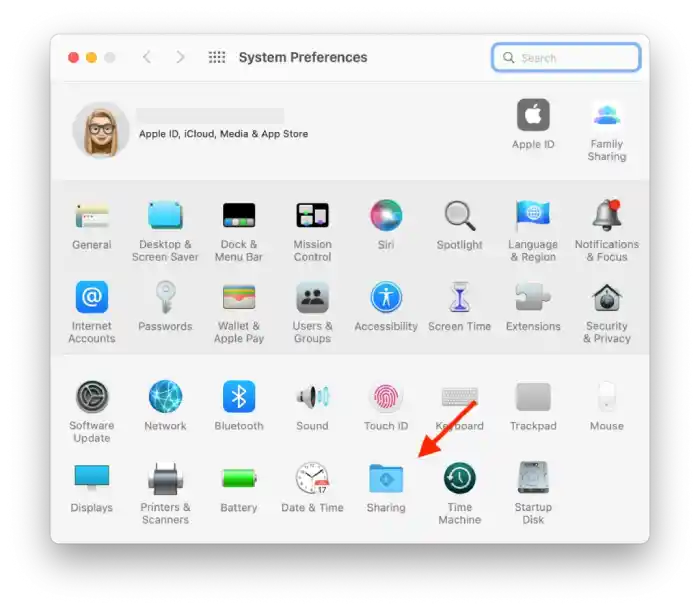
- Then go to Sharing.
- There you should see the Computer Name box.
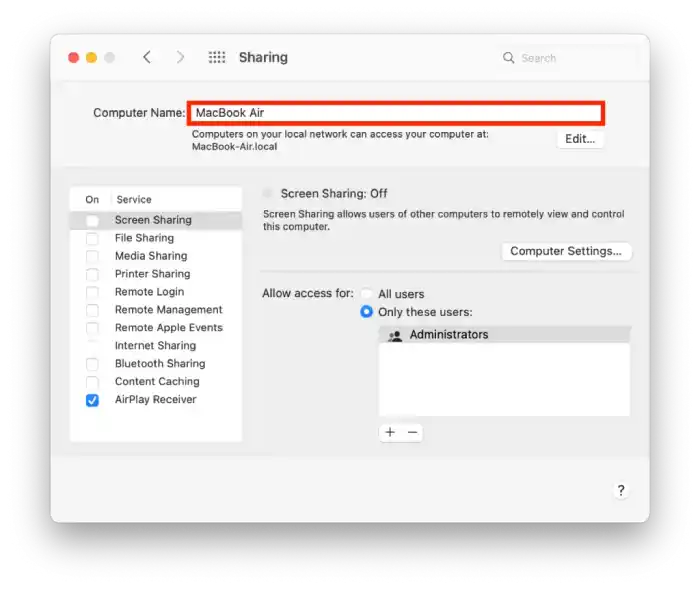
- Enter your Mac’s new name and close the window.
Mac should automatically save the new name. Keep in mind that you also change your local network address with this. If the AirDrop name remains the same, try rebooting the device and repeat the steps above.
How to fix Apple device isn’t showing the new AirDrop name
You should know that not all Apple devices have the AirDrop feature. It’s available on iPhones and iPads running iOS 7 or later and on Macs and MacBooks released in 2012 or later that run at least OS X Yosemite.
If the iOS or macOS version is OK, but you still can’t change the AirDrop name, you can try to reboot your Apple device.
How to reboot iPhone
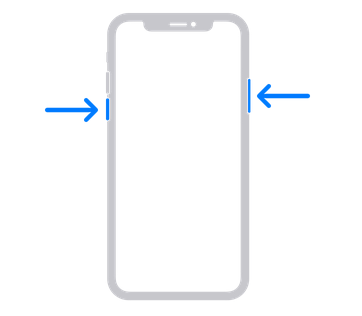
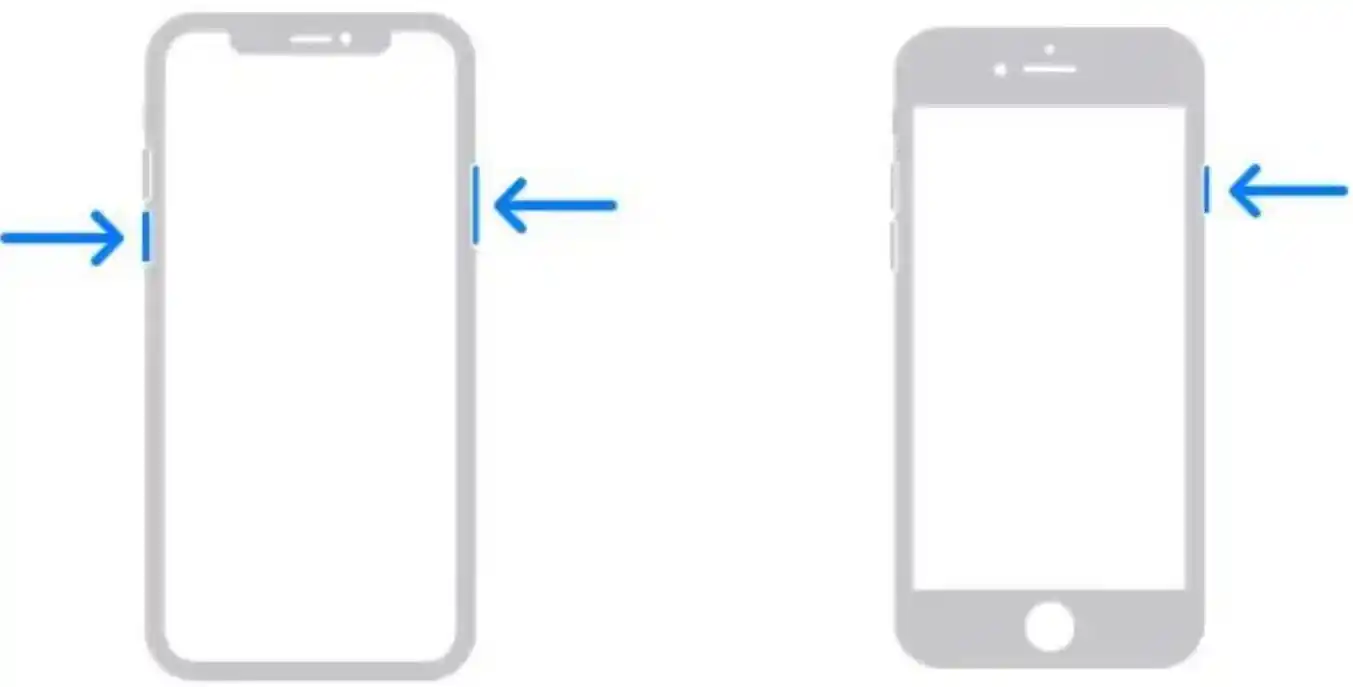
To restart your iPhone X, 11, 12, 13, or later, press and hold the Volume and Side buttons simultaneously until the power-off slider appears. Then drag the slider and wait 30 seconds for your smartphone completely to turn off. After that, press and hold the Side button to turn on your iPhone.
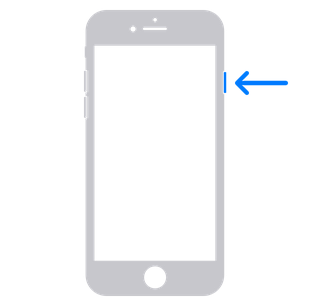
To reboot your iPhone 6, 7, 8, or SE (2nd or 3rd generation), press and hold the Side button until the power-off slider appears. Then drag the slider and wait 30 seconds for your smartphone completely to turn off. After that, press and hold the Side button again until you see the Apple logo.
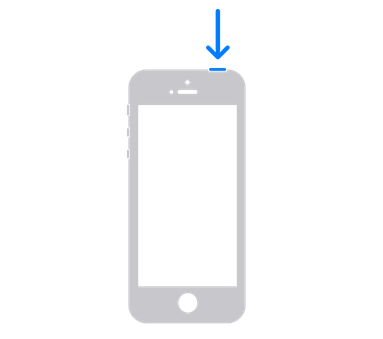
To restart your iPhone SE (1st generation), 5 or earlier, press and hold the Top button until the power-off slider appears. Then drag the slider and wait 30 seconds for your iPhone completely to turn off. After that, press and hold the Top button again to turn the device on.
How to reboot iPad
To restart an iPad without a Home button, press and hold the Top and Volume buttons simultaneously until the power-off slider appears. Then drag the slider and wait 30 seconds for your tablet completely to turn off. After that, press and hold the Top button to turn on your iPad.
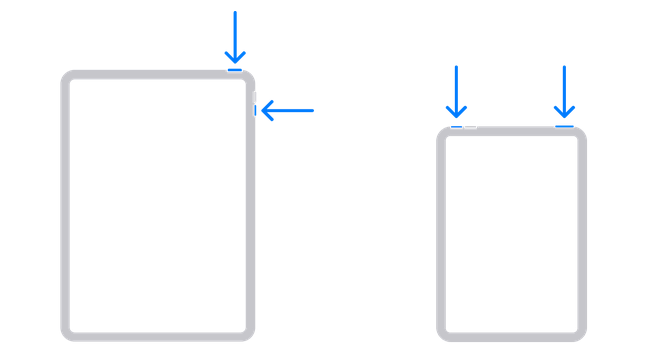
To restart an iPad with a Home button, press and hold the Top button until the power-off slider appears. Then drag the slider and wait 30 seconds for your tablet completely to turn off. Finally, press and hold the Top button to turn on your iPad.

How to reboot Mac
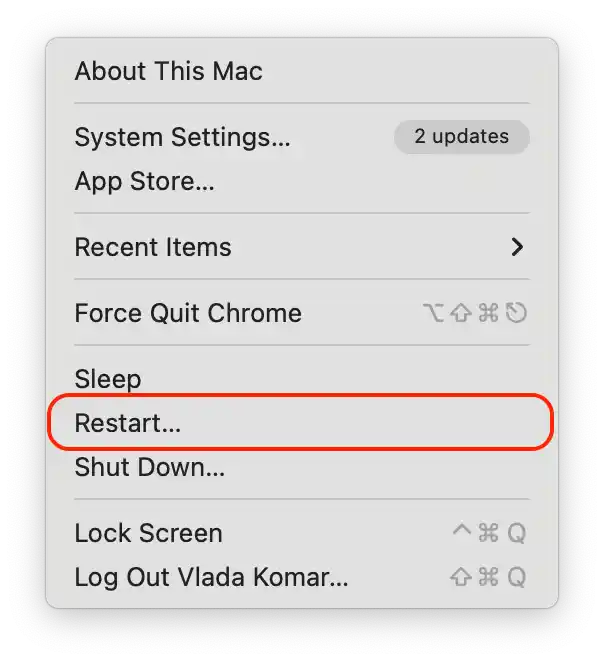
It’s much easier with Mac.
- Click on the Apple icon and select Restart.
After you have rebooted your Apple device, try changing the AirDrop name again, as shown above.
Why you can’t change your AirDrop name
The name AirDrop is the name of the Apple device. Therefore, you need to understand the reasons and follow the steps to fix the device name change.
In fact, this situation is rare for users, and there may be several reasons for it. Sometimes it is a system failure and rebooting the device can fix it. And sometimes the iPhone or iPad needs an iOS or iPadOS update. If you encounter such a problem on a Mac it’s best to change the name immediately through Terminal. So let’s fix this problem.
For iPhone and iPad:
Reboot your device
- On an iPhone with Face ID press and hold the Volume and Side buttons simultaneously until the power-off slider appears.
- On an iPhone with Touch ID press and hold the Side button until the power-off slider appears.
- Then drag the slider and wait 30 seconds.
- To restart an iPad without a Home button, press and hold the Top and Volume buttons simultaneously until the power-off slider appears. Then drag the slider and wait 30 seconds

- Then press and hold the Side button until the power-off slider appears.
Update iOS or iPadOS
- Open Settings.
- Select the General section.
- Tap on Software update.
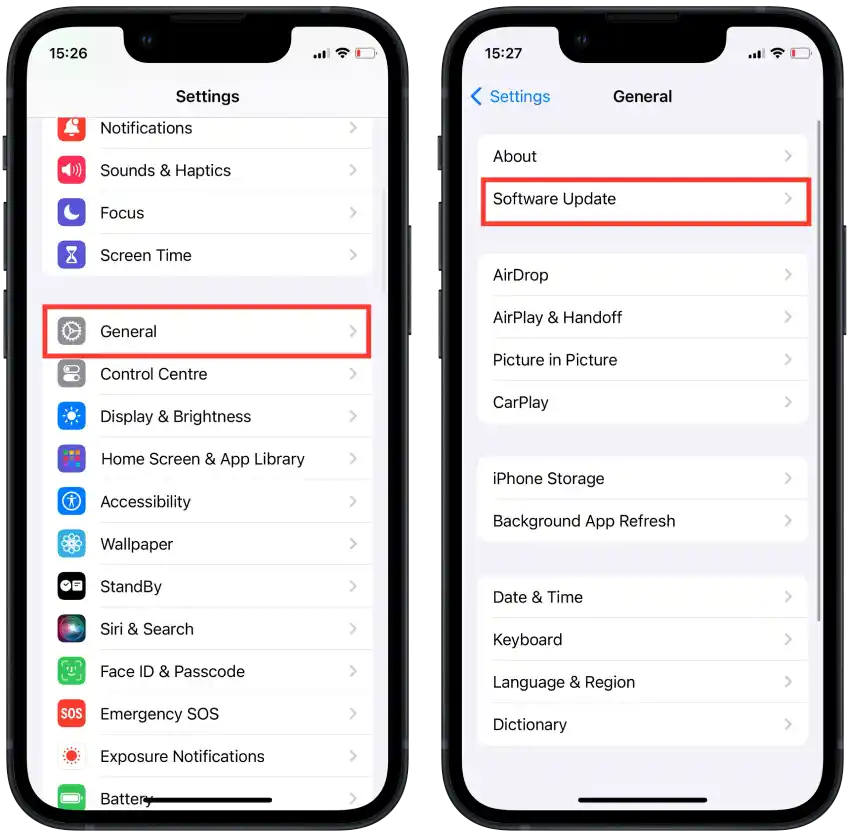
- Then tap Install.
Then follow the instructions to install. You will need to enter a password on your iPhone or iPad and agree to the privacy policy.
For Mac:
Restart Mac
- Click on the Apple icon in the upper left corner.
- Then from the list, click Restart.
Use the Terminal
- Open the Terminal app on your Mac.
- To rename the Mac name, enter and execute the following command:
sudo scutil –set ComputerName YourComputerName

After that, the name should change.
Contact Apple Support
If you’re still having trouble, contact Apple Support. They can provide more specific guidance and assistance. Describe the problem right away, also include screenshots so they can give you an accurate answer.
How to get to AirDrop menu
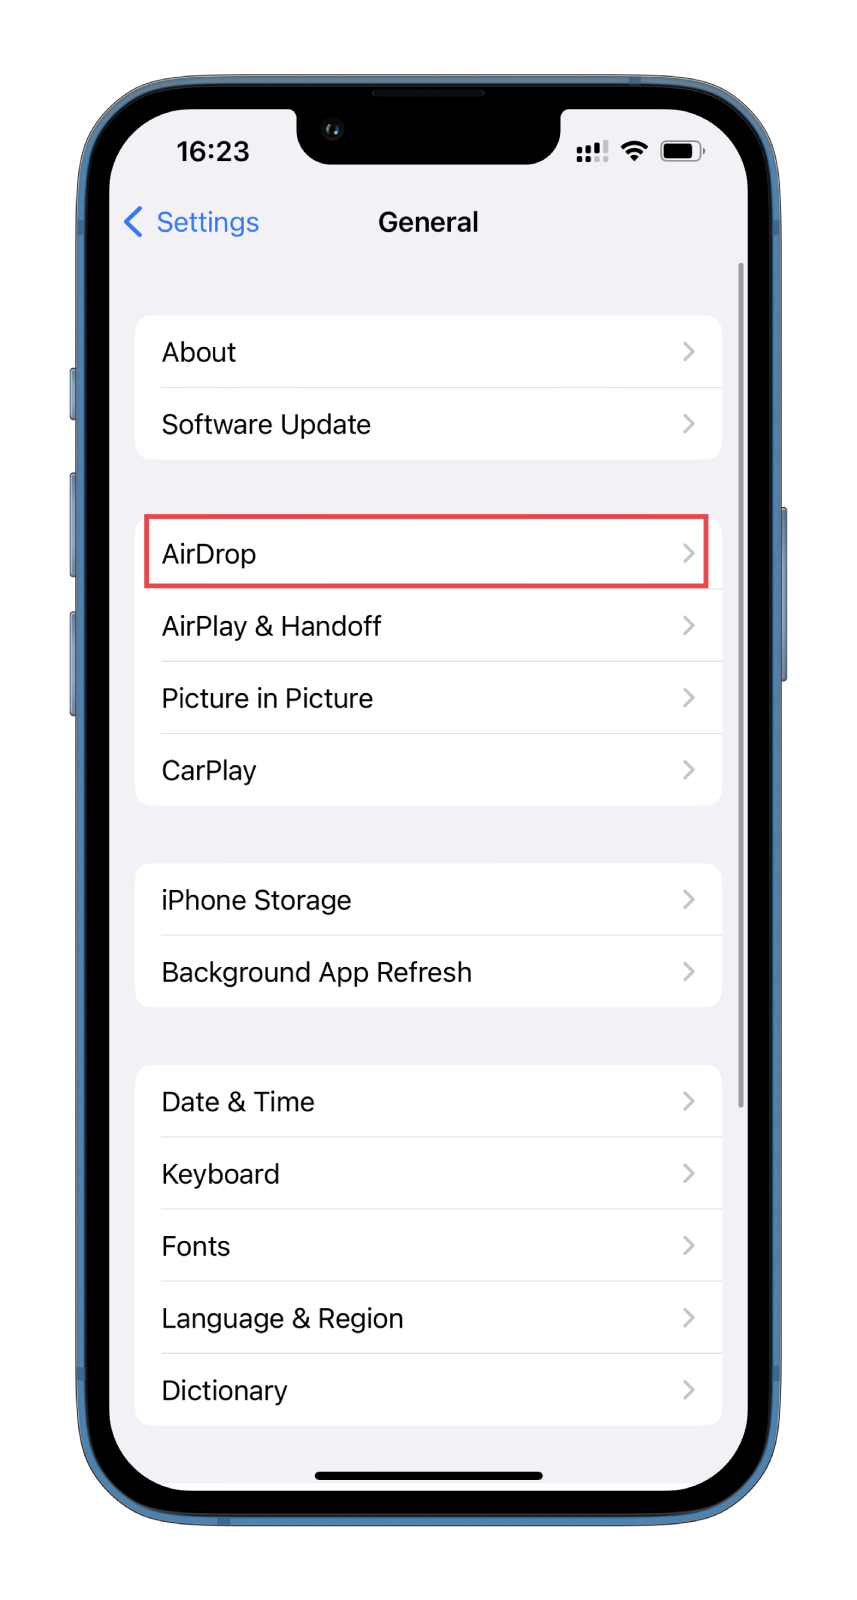
To open the AirDrop page on your iPhone or iPad, you need to follow these steps:
- Open the Settings app.
- Then go to the General section.
- Open the AirDrop section.
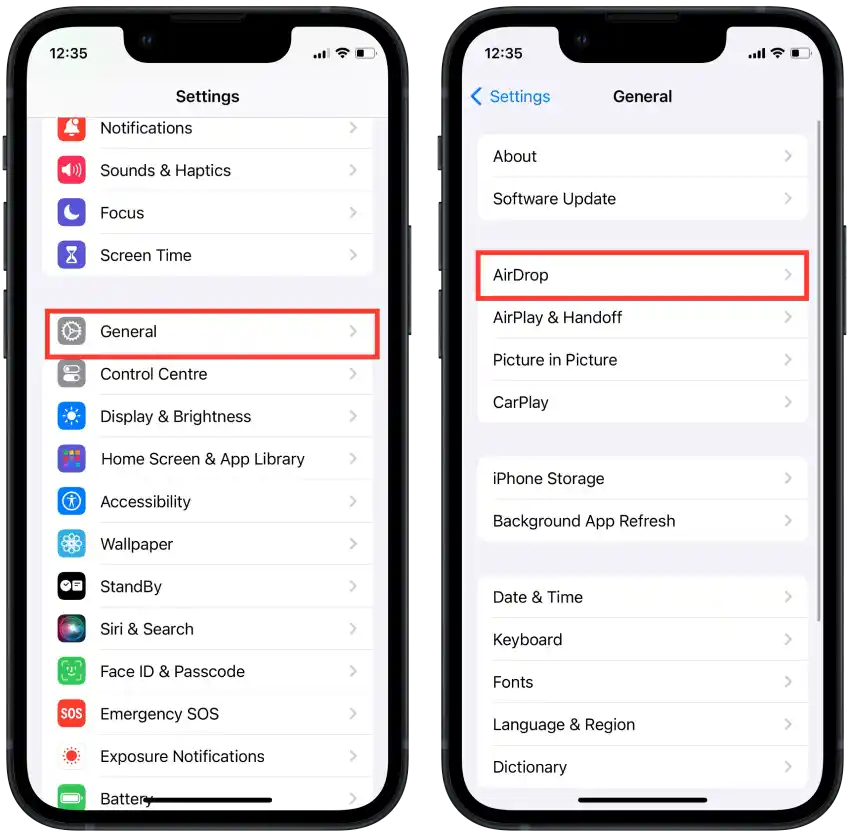
- In the new box, you can change your AirDrop settings.
To open the AirDrop page on your Mac, you need to follow these steps:
- Open Finder on Mac.

- Then select the AirDrop section.

- In this window, you can change your AirDrop settings.
With these steps, you can select who can share files with you and see the users nearby.
How does AirDrop work
AirDrop is a way to quickly and easily share files between Apple devices such as iPhones, iPads, and Macs.
Once your device finds another compatible device, they create a temporary and secure connection between them using Bluetooth. They then switch to a faster Wi-Fi connection to transfer the file.
In AirDrop settings, you can choose who can see your device and send you files through AirDrop. You can choose “Everyone”, “Contacts only”, or “Off”.
After one user selects Share using AirDrop, another user will be prompted to get some files. If the other user clicks Accept, the file will start sending. This usually takes a few seconds.
When the file is transferred, your device and the recipient’s device are notified that the transfer is complete. The file is saved on the recipient’s device.
How to change AirDrop privacy settings
Changing your AirDrop privacy settings is important because if you have the AirDrop option turned off or set to “Contacts only”, you won’t be able to send files to other users.
To change AirDrop privacy settings on your iPhone or iPad, you need to follow these steps:
- Open the Settings app.
- Then go to the General section.
- Open the AirDrop section.
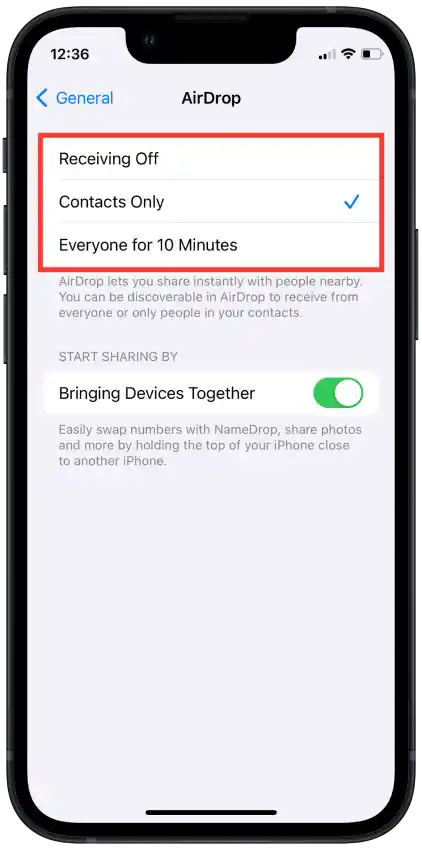
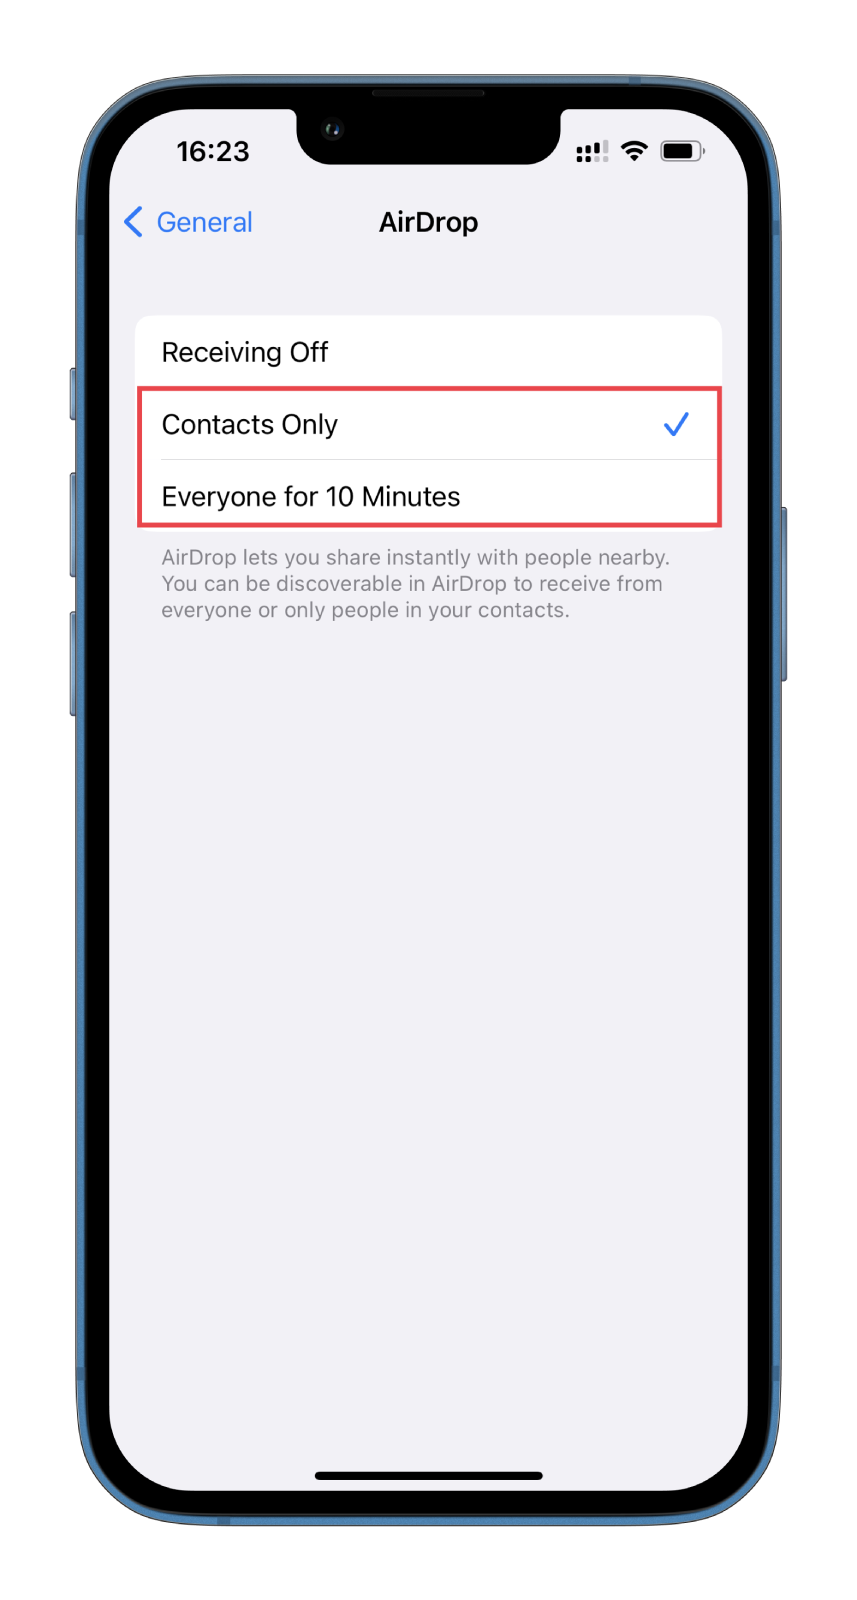
- In the new window, you will see 3 options:
- Receiving Off – If you choose “Off”, then no other device will be able to see your device and send you files via AirDrop. This will completely disable the AirDrop feature for your iPhone or iPad.
- Contacts Only – If you select this option, only Apple devices that are in your contacts book will be able to see your device and send you files using AirDrop. This can be a more private option to only allow people you know to send you files.
- Everyone for 10 Minutes – If you select any compatible Apple device in your vicinity will be able to see your device and send you files via AirDrop for 10 minutes. This option is worth enabling when you want to be available to everyone in your nearby location.
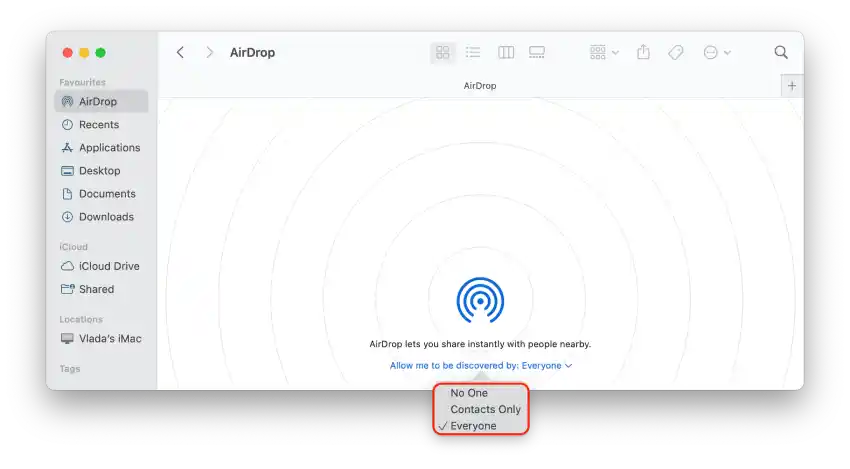
To change AirDrop privacy settings on Mac, you need to follow these steps:
- Open Finder on Mac.
- Then select the AirDrop section.
- Click on the “Allow me to be discovered by” option, you will see 3 options:
- No one – When you select this option, AirDrop will be disabled on your Mac. No other device will be able to see your computer and send files via AirDrop.
- Contacts only – If you select this option, you will only be able to share files on your Mac with your contacts.
- Everyone – Any nearby Apple devices that can work with AirDrop will be able to see your Mac and send you files.
How to use AirDrop
Before you start transferring files, decide who you want to allow to see you in AirDrop. In the AirDrop settings, select “Contacts Only” or “Everyone” depending on your preference. This is described in the section above.
How to send any file from iPhone or iPad to Mac via AirDrop
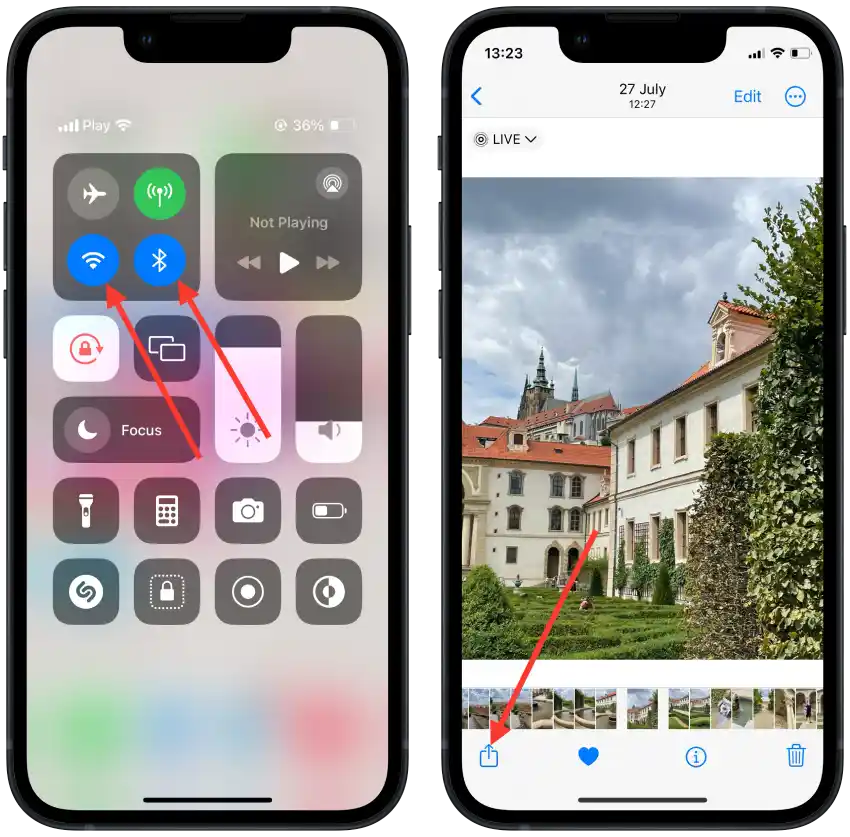
- On your iPhone, make sure you have Wi-Fi and Bluetooth enabled.
- Also on a Mac, make sure you have Wi-Fi and Bluetooth enabled.
- On your iPhone, open the file you want to open.
- Tap the Share icon.
- Then select AirDrop.
- In the list of devices, select Mac.
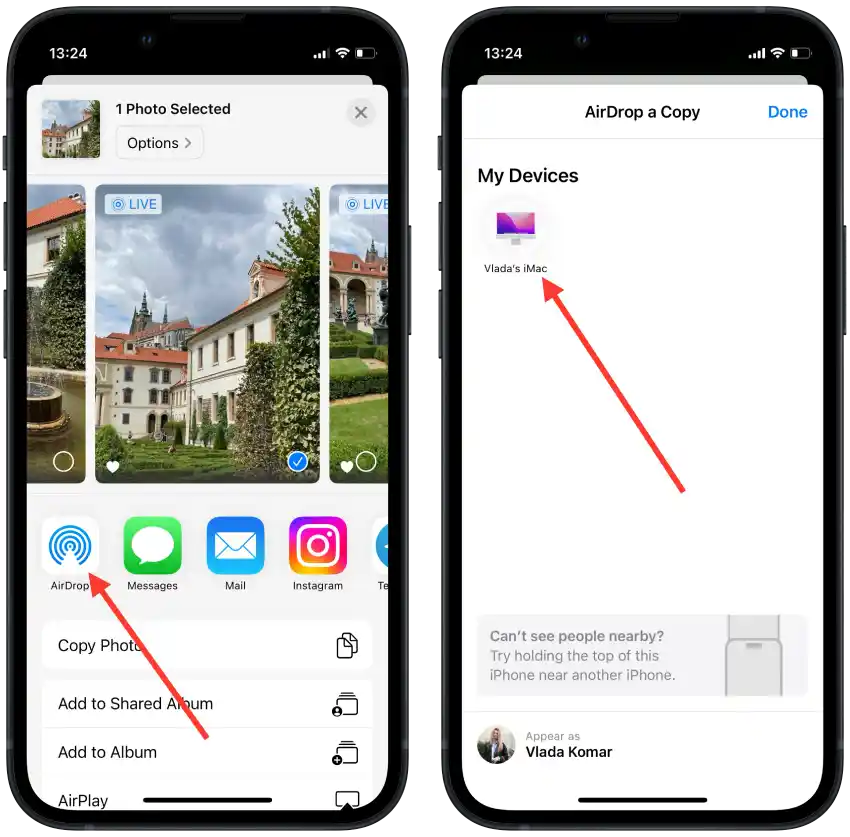
- On your Mac, click Accept.

How to send any file from Мас to iPhone or iPad via AirDrop
- On your iPhone, make sure you have Wi-Fi and Bluetooth enabled.
- Also on a Mac, make sure you have Wi-Fi and Bluetooth enabled.
- On Mac, open the file you want to share.
- Click the Share icon.
- Then select AirDrop.
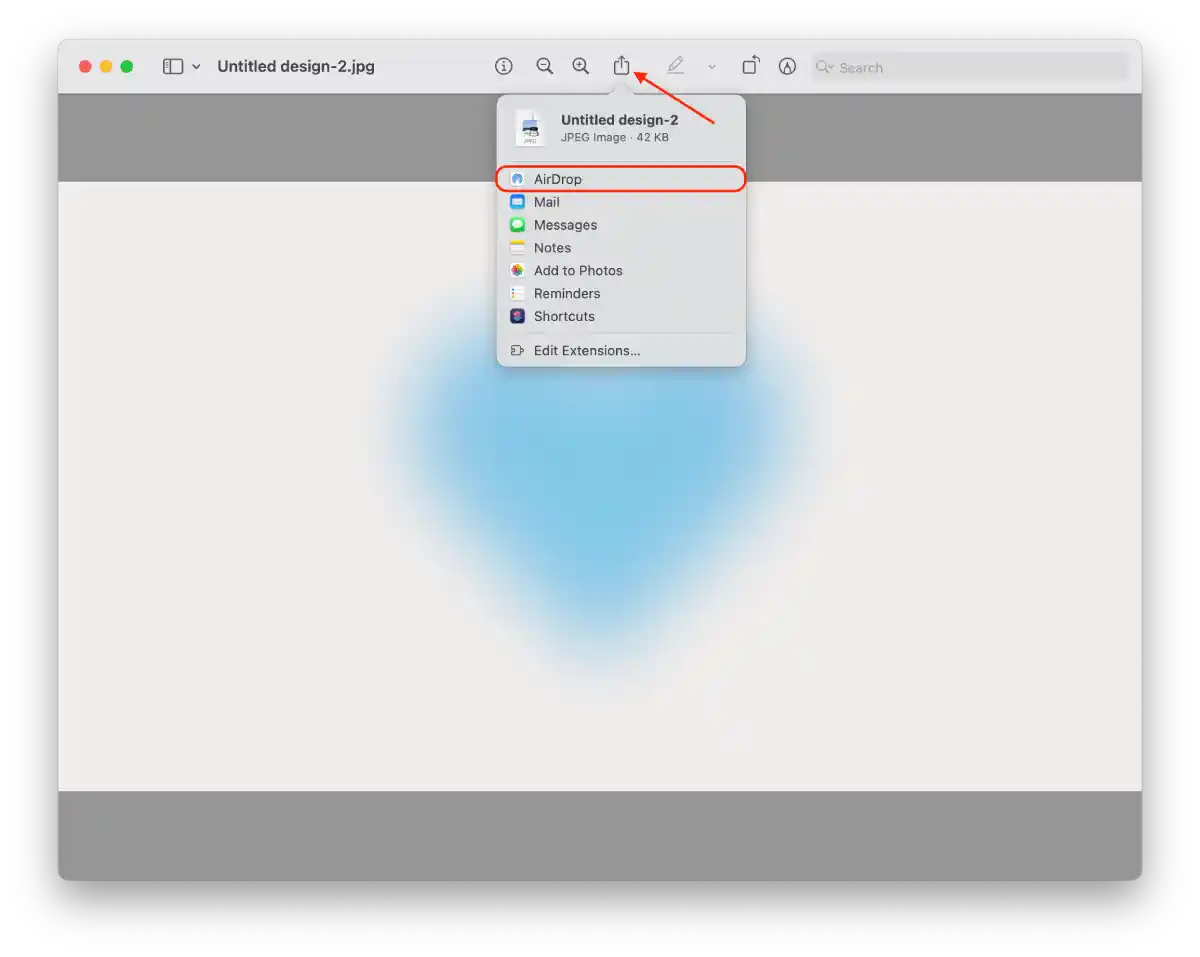
- In the list of devices, select iPhone or iPad.

- On your iPhone or iPad, tap Accept.
If your Mac and iPhone use the same Apple ID, you will not be prompted to accept any file. It will be automatically sent.
How far can you AirDrop
The reach of AirDrop, whether on iPhone, iPad, or Mac, primarily hinges on the potency of the Bluetooth and Wi-Fi connections, as well as any barriers that might obstruct signal flow.
Typically, AirDrop functions most optimally when devices are situated closely to one another. The distance that is usually suggested for a fruitful AirDrop exchange is approximately 30 feet.
Nevertheless, this span can fluctuate due to variables like interference from other wireless gadgets, the caliber of Bluetooth and Wi-Fi links, and any obstructions that might be situated between the devices.
How to make AirDrop Anonymous
AirDrop does not have a built-in “anonymous” mode, as the technology is designed for secure and direct file sharing between devices.
In fact, if you want to send a file to someone, you can do it without being noticed. When you send any file, the other user will only see the name of your device. So you can change the name of your iPhone, iPad or Mac without anyone realizing it’s you.
Only for this, the user to whom you want to send the file must have AirDrop for Everyone. Because if AirDrop for Contacts, the other user will be able to guess you. When you transfer a file from a contact, a small circle with the contact’s photo will appear next to the AirDrop icon (if it has been added before).
Why can no one see my AirDrop?
If you find that no one can see your Apple device via AirDrop, there may be a problem with its settings. For example, your iPhone and iPad have several modes: Receiving Off, Contacts Only and Everyone for 10 Minutes. With the first option enabled, no one will be able to see your mobile device. But you can change it:
- Open Settings and go to General.
- Then tap AirDrop.
- Finally, select Contacts Only or Everyone.
Also check that Bluetooth is switched on. What’s more, some users report that Personal Hotspot interferes with AirDrop. Therefore, it is worth turning it off.
If you are experiencing the same problem on your Mac, you can fix it in much the same way.
- Go to Finder.
- Select AirDrop from the side menu.
- Ensure that Allow me to be discovered by is set to Everyone.
Your device should now be visible to others and you can receive files. If you are still unable to set up AirDrop or it’s not working for you, the best solution is to visit the nearest Apple Store or contact Apple Support.
AirDrop compatibility
Not all Apple devices can use AirDrop due to differences in hardware capabilities and software requirements. While newer iPhone, iPad, and Mac models support AirDrop, older models or devices with older operating systems may not have access to AirDrop.
What Macs support AirDrop
AirDrop is supported on all Mac models released in 2012 and later.
- MacBook Air (2012 and later)
- MacBook Pro (2012 and later)
- iMac (2012 and later)
- Mac mini (2012 and later)
- Mac Pro (2013 and later)
However, these Mac computers require OS X Yosemite or later to use AirDrop.
What iPhones and iPads support AirDrop
I put iPhones and iPads in the general category since these devices were previously on the same iOS. The AirDrop feature was introduced in iOS 7.
AirDrop appeared on:
- iPhone 5 and later
- iPad 4 and later
- iPad mini
Thus all further devices and iOS support AirDrop.
